
Installing a mini split AC system can seem daunting, but with the right tools and a clear guide, it’s a manageable DIY project for many homeowners. This comprehensive guide will walk you through every critical step, from choosing the right unit and preparing your space to connecting electrical lines, evacuating refrigerant lines, and testing your new system. Following these instructions carefully can lead to significant savings and comfortable climate control, empowering you to tackle your own mini split installation with confidence.
Key Takeaways
- Planning is Crucial: Before starting, carefully choose the right mini split AC system for your space and check local building codes and permits. This prevents costly errors and ensures compliance.
- Safety First: Always prioritize safety. Disconnect power, wear appropriate personal protective equipment (PPE), and ensure you’re comfortable working with electrical components and refrigerants. If unsure, consult a professional.
- Vacuum Pump is Non-Negotiable: Evacuating the refrigerant lines with a vacuum pump is perhaps the most critical step. Skipping this can lead to system failure and void your warranty. Do not bypass this step.
- Proper Connections are Key: Meticulously connect all refrigerant lines and electrical wiring according to manufacturer instructions. Leaks or incorrect wiring can cause serious damage or safety hazards.
- Professional Assistance for Electrical: While much of the installation is DIY-friendly, consider hiring a licensed electrician for the final electrical connections to ensure safety and code compliance.
- Test Thoroughly: After installation, thoroughly test your mini split AC system to confirm it’s cooling (or heating) effectively and that there are no leaks or unusual noises.
- Read Your Manual: Every mini split AC system is slightly different. Always consult your specific unit’s installation manual alongside this guide for precise instructions and specifications.
How to Install a Mini Split AC
Are you tired of uneven temperatures in your home? Do you dream of targeted cooling or heating without the hassle of ductwork? Installing a mini split AC system might be the perfect solution! These versatile, energy-efficient units offer zone control, allowing you to heat or cool specific areas of your home, saving energy and money. While the idea of a DIY mini split installation might seem intimidating, it’s a project many homeowners can tackle with the right tools, careful planning, and a detailed guide.
This comprehensive guide will walk you through the entire process of how to install a mini split AC, from initial planning to enjoying your newly installed comfort system. We’ll break down each step into easy-to-understand instructions, provide practical tips, and help you avoid common pitfalls. By the end, you’ll have the confidence and knowledge to successfully install a mini split AC unit and enjoy a more comfortable home.
Let’s get started and transform your living space with efficient, quiet comfort!
Pre-installation Planning
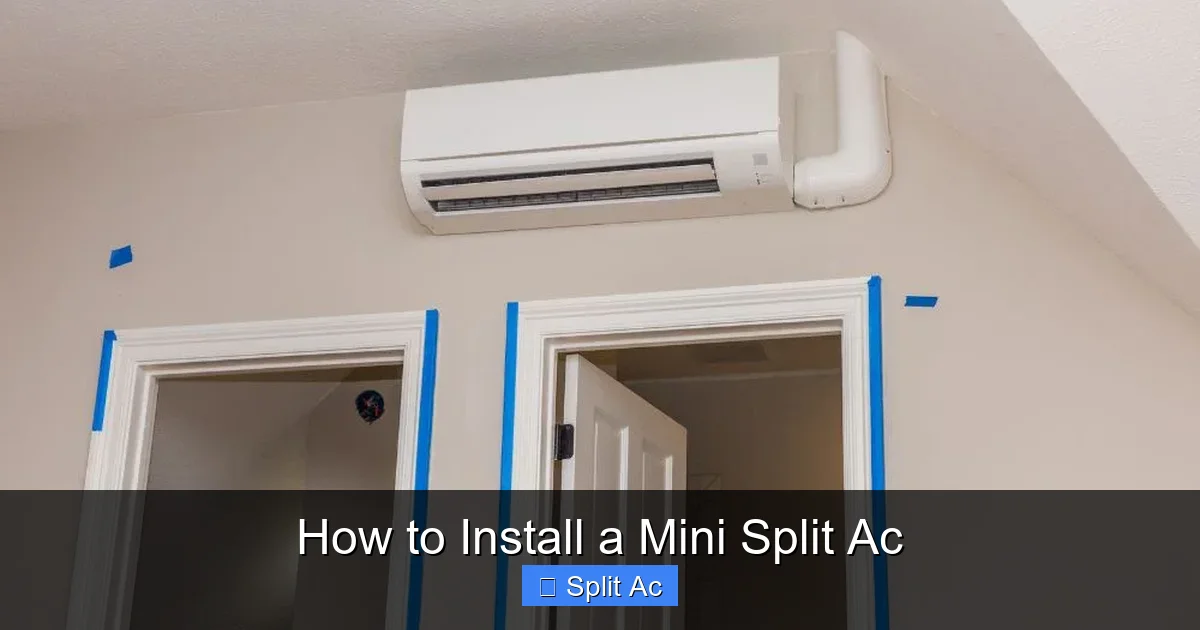
Visual guide about How to Install a Mini Split Ac
Image source: pioneerminisplit.com
Before you even touch a tool, thorough planning is essential for a successful mini split installation. This phase sets the foundation for the entire project and helps prevent costly mistakes.
Choosing the Right System
The first step in your mini split AC journey is selecting the correct unit for your needs. Consider these factors:
- Sizing (BTUs): This is paramount. An undersized unit won’t cool effectively, while an oversized one will cycle on and off too frequently, reducing efficiency and comfort. Consult a BTU calculator online or ask a professional to determine the appropriate British Thermal Units (BTUs) for your room size and climate.
- SEER Rating: The Seasonal Energy Efficiency Ratio (SEER) indicates how energy-efficient the unit is. Higher SEER ratings mean lower energy bills.
- Single-Zone vs. Multi-Zone: Do you need to cool/heat just one room (single-zone) or multiple rooms (multi-zone)? Multi-zone systems connect several indoor units to one outdoor condenser.
- Features: Look for features like Wi-Fi control, sleep mode, dehumidification, and quiet operation that might be important to you.
Tip: Always buy from a reputable brand and check reviews. Ensure the system comes pre-charged with refrigerant, which most DIY-friendly mini splits do.
Checking Local Codes & Permits
This is a critical, often overlooked step. Building codes vary significantly by city, county, and state.
- Contact your local building department to inquire about permits required for HVAC installation.
- Ask about electrical code requirements, especially for dedicated circuits.
- Understanding these regulations upfront will save you potential headaches and fines later. Skipping this can lead to your system being flagged, requiring costly modifications or removal.
Gathering Tools & Materials
Having all your tools and materials ready before you start will make the installation process much smoother. Here’s a list of what you’ll likely need:
- Mini Split AC System: Indoor unit, outdoor unit, line set (refrigerant lines, communication cable, drain hose), mounting plate.
- Basic Hand Tools: Screwdrivers (Phillips and flathead), adjustable wrenches, pliers, measuring tape, level.
- Drill: With a large hole saw (usually 2.5-3.5 inches, check your manual) for the line set, and various drill bits for mounting.
- Vacuum Pump & Manifold Gauge Set: Absolutely essential for evacuating the lines. Rentable from tool rental shops.
- Tube Cutter & Flaring Tool: If your line set connections require flaring (some come pre-flared).
- Torque Wrench: For tightening refrigerant line connections to specified values.
- Electrical Supplies: Wire strippers, voltage tester, electrical tape, appropriate gauge electrical wire, disconnect box, circuit breaker (if needed).
- Mounting Hardware: Lag bolts, concrete anchors (if mounting outdoor unit on a pad), wall anchors.
- Sealant & Insulation: HVAC-grade caulk, spray foam, line set insulation tape.
- Drain Line Materials: PVC pipe, fittings, or flexible hose for condensate drainage.
- Outdoor Unit Mounting: Pre-formed concrete pad, wall bracket, or ground stand.
- Safety Gear: Gloves, safety glasses.
Safety First!
Working with electricity and refrigerants can be dangerous if not handled properly.
- Always disconnect power at the breaker before making any electrical connections.
- Wear safety glasses and gloves.
- If you are uncomfortable with any part of the electrical or refrigerant work, hire a licensed professional. It’s better to be safe than sorry.
- Have a fire extinguisher nearby.
Step-by-Step Mini Split Installation
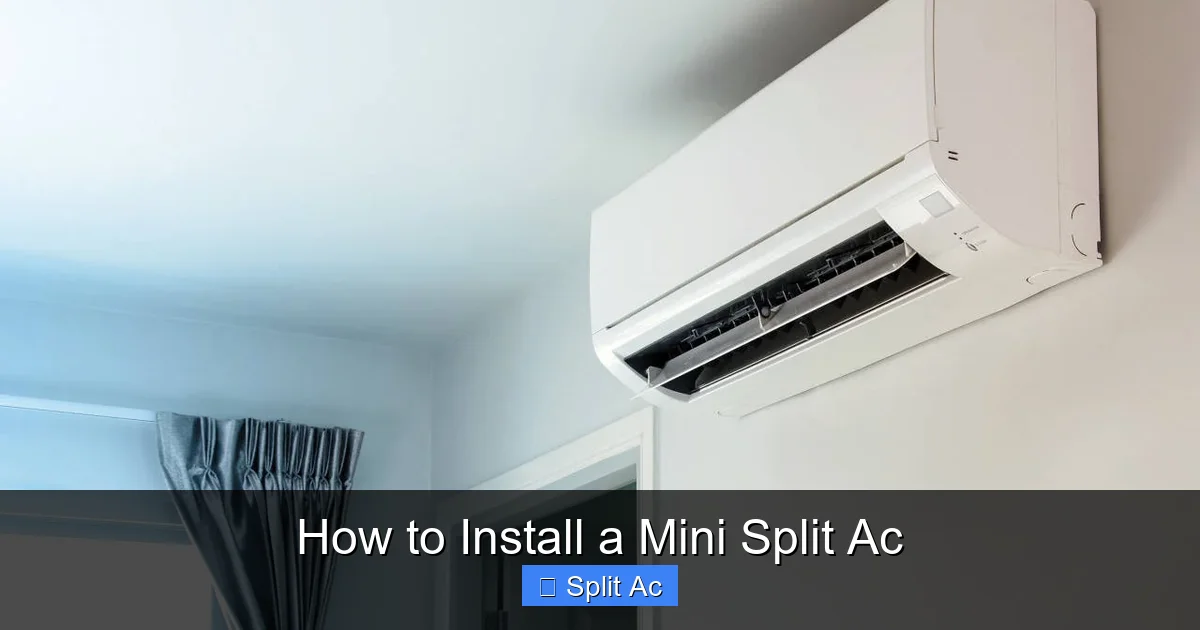
Visual guide about How to Install a Mini Split Ac
Image source: inchcalculator.com
Now that your planning is complete and your tools are ready, let’s dive into the hands-on installation of your mini split AC system.
Step 1: Mount the Indoor Unit
The indoor unit, or air handler, is typically mounted high on a wall.
Locate the Ideal Spot
- Choose a wall that is sturdy and free of obstructions (pipes, electrical wires).
- Ensure there’s enough clearance around the unit for air circulation (check your manual).
- The unit should be centrally located in the room for even air distribution.
- Consider the path for the line set and drain line to the outside.
Install the Mounting Plate
- Hold the metal mounting plate (included with your unit) against the wall in your chosen location.
- Use a level to ensure it’s perfectly straight.
- Mark the screw holes with a pencil.
- Drill pilot holes, then secure the mounting plate to the wall using the appropriate screws and anchors for your wall type.
Drill Hole for Line Set
- Your manual will specify the exact location and size for the hole through the wall. Typically, it’s about 2.5 to 3.5 inches in diameter.
- Use a large hole saw to drill this hole. Drill slightly downward from the inside out to ensure proper drainage of the condensate line.
- Ensure the hole is large enough for the refrigerant lines, communication cable, and drain hose to pass through easily.
Step 2: Connect Refrigerant Lines & Drain Hose to Indoor Unit
Before mounting the indoor unit on the plate, you’ll connect some components.
- Carefully uncoil the line set.
- Connect the copper refrigerant lines (two of them – one larger, one smaller) to the corresponding ports on the back of the indoor unit. Ensure you use two wrenches – one to hold the connection steady and one to tighten the flare nut. Tighten firmly but do not overtighten, as this can damage the flares. Use a torque wrench if specified by the manufacturer.
- Attach the condensate drain hose to the drain outlet on the indoor unit. Make sure it runs downhill to ensure proper drainage.
- Connect the communication cable (low-voltage wiring) to the terminals inside the indoor unit’s wiring compartment, following the wiring diagram in your manual.
- Once all connections are made, carefully slide the indoor unit onto the mounting plate. It should click securely into place.
Step 3: Prepare the Outdoor Unit Pad/Mount
The outdoor unit, or condenser, needs a stable, level base.
- Ground Mount: Dig a shallow trench and lay a pre-formed concrete pad or construct a gravel pad. Ensure it’s perfectly level and allows for proper drainage around the unit.
- Wall Mount: Use a heavy-duty wall bracket designed for mini split condensers. Secure it firmly to the building’s exterior studs or masonry using appropriate lag bolts and anchors.
- Elevation: Ensure the unit is elevated slightly off the ground to prevent snow, ice, or vegetation from impeding airflow or damaging the unit.
Step 4: Mount the Outdoor Condenser
- Carefully place the outdoor unit onto your prepared pad or bracket.
- Secure it to the base using bolts or straps provided by the manufacturer or appropriate hardware. This prevents vibration and theft.
- Ensure there’s sufficient clearance around the unit for airflow – check your manual for specific distances.
Step 5: Run the Line Set and Electrical Conduit
This step involves connecting the indoor and outdoor units.
- Feed the bundle of refrigerant lines, communication cable, and drain hose (the line set) through the wall hole you drilled earlier.
- Gently guide the line set down the exterior wall towards the outdoor unit. Avoid sharp bends or kinks, as this can restrict refrigerant flow.
- Secure the line set to the exterior wall using line set clips or straps, typically every few feet.
- Insulate the copper refrigerant lines individually, if they aren’t pre-insulated, to prevent energy loss and condensation. Then, wrap the entire bundle (refrigerant lines, communication cable, drain hose) with UV-resistant vinyl tape to protect it from the elements.
- Seal the wall penetration around the line set with HVAC-grade caulk or expanding foam to prevent air and pest infiltration.
Step 6: Make Electrical Connections
Remember: ALWAYS turn off power at the circuit breaker before beginning any electrical work.
Indoor Unit Wiring
- You’ve already connected the communication cable (low-voltage) to the indoor unit in Step 2. This cable runs to the outdoor unit.
- Some units also require a separate power supply for the indoor unit, while others are powered entirely from the outdoor unit. Consult your specific manual.
Outdoor Unit Wiring
- Run the appropriate gauge electrical wire from your dedicated circuit breaker (or disconnect box if required by code) to the outdoor unit.
- Many mini splits require a dedicated 240V circuit. Consult your electrician if you’re unsure.
- Connect the power wires (L1, L2, and Ground) to the corresponding terminals inside the outdoor unit’s electrical panel.
- Connect the communication cable from the indoor unit to the designated low-voltage terminals in the outdoor unit. Double-check all connections against the wiring diagram in your manual.
- Securely close the electrical panel cover.
Tip: If you are not comfortable with electrical work, it is highly recommended to hire a licensed electrician for this step to ensure safety and code compliance.
Step 7: Connect Refrigerant Lines to Outdoor Unit
This is similar to connecting them to the indoor unit, but with the added step of potentially flaring the lines if your system requires it.
- Carefully connect the copper refrigerant lines to the service valves on the outdoor unit. Ensure you match the larger line to the larger port and the smaller line to the smaller port.
- Use two wrenches – one to hold the valve steady and one to tighten the flare nut. Tighten to the manufacturer’s specified torque using a torque wrench.
- Ensure all connections are snug but not overtightened.
Tip: After connecting, spray the connections with a soapy water solution. If bubbles appear when the system is pressurized (after evacuation), you have a leak.
Step 8: Evacuate the Refrigerant Lines (Crucial!)
This is arguably the most critical step for the longevity and efficiency of your mini split AC system. You *must* remove all air and moisture from the refrigerant lines before releasing the refrigerant. Air and moisture in the lines can cause system failure, corrosion, and void your warranty.
- Connect your manifold gauge set to the service ports on the outdoor unit. Typically, the blue hose connects to the larger low-pressure port, and the yellow hose connects to the vacuum pump.
- Ensure the service valves on the outdoor unit are still closed.
- Turn on the vacuum pump. It will pull a vacuum on the refrigerant lines, removing air and moisture.
- Watch the low-pressure gauge. It should drop to at least 500 microns (or about -29.9 inches of mercury on a standard gauge). Let the pump run for at least 30-60 minutes, or longer for longer line sets, to ensure a deep vacuum.
- Once the desired vacuum is reached, close the valve on the manifold gauge set (between the yellow hose and the pump) and then turn off the vacuum pump.
- Monitor the gauge for at least 15-30 minutes. If the needle rises, you have a leak that must be found and fixed before proceeding. If it holds steady, your lines are sealed and evacuated.
Step 9: Release Refrigerant
Your mini split AC system typically comes pre-charged with enough refrigerant for a standard line set length.
- Once the vacuum test is successful, you can release the refrigerant from the outdoor unit into the evacuated lines.
- Using an adjustable wrench, fully open the liquid line (smaller line) service valve. You’ll hear a hiss as refrigerant flows into the lines.
- Then, fully open the gas line (larger line) service valve.
- Carefully disconnect the manifold gauge set from the service ports. There will be a slight hiss of refrigerant as you do, which is normal. Replace the caps on the service ports.
Step 10: Test the System
The moment of truth!
- Go back to your electrical panel and turn on the dedicated circuit breaker for your mini split AC.
- Turn on the indoor unit using the remote control.
- Set it to cool mode and a low temperature.
- Listen for unusual noises. Check if cold air is coming from the indoor unit.
- Check the outdoor unit for proper operation. Feel the two copper lines; one should be cold, and the other should be warm (when cooling).
- Ensure the drain line is dripping condensate outside.
- Allow the system to run for at least 15-30 minutes to ensure it’s functioning correctly.
Troubleshooting Common Issues
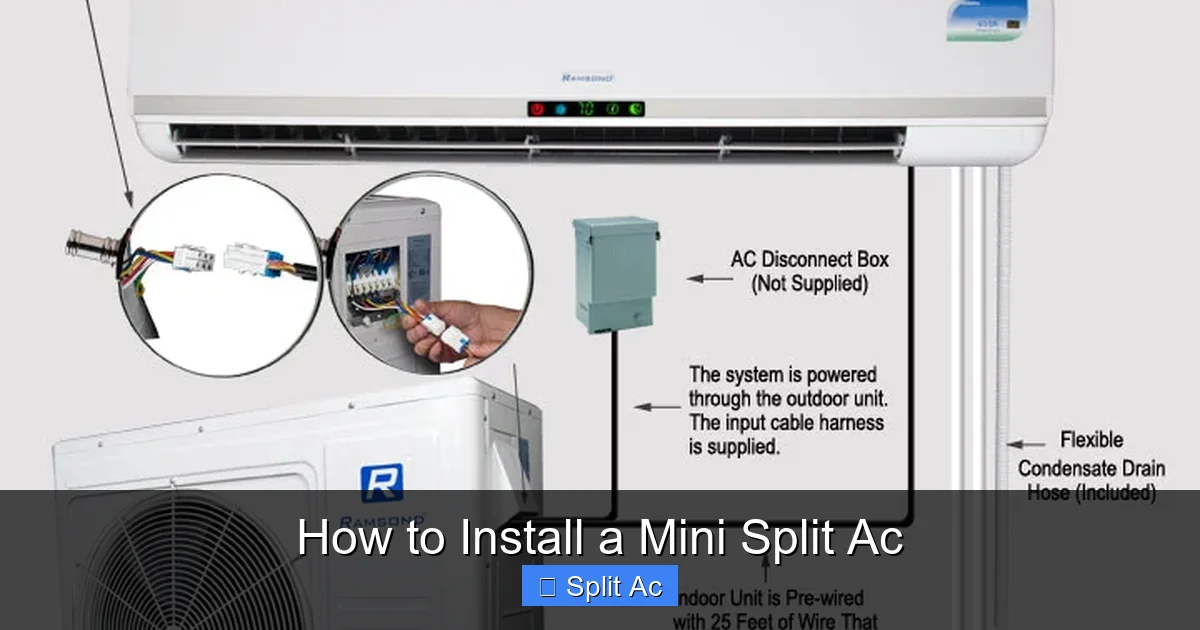
Visual guide about How to Install a Mini Split Ac
Image source: ramsond.com
Even with careful installation, sometimes issues arise. Here are some common problems and their solutions:
No Power to the Unit
- Check Breaker: First, check if the dedicated circuit breaker for the mini split AC has tripped. Reset it if it has.
- Electrical Connections: Double-check all electrical wiring connections at both the indoor and outdoor units, ensuring they are secure and match the wiring diagram.
- Disconnect Switch: If you have an outdoor disconnect switch, ensure it’s in the “ON” position.
Unit Not Cooling/Heating Effectively
- Thermostat Settings: Verify the unit is set to the correct mode (cool/heat) and temperature.
- Airflow Obstructions: Check if anything is blocking the air intake or output vents on both indoor and outdoor units. Clean filters if dirty.
- Refrigerant Leak: If the unit runs but doesn’t cool, you might have a refrigerant leak. This requires professional diagnosis and repair, as well as recharging the system.
- Insufficient Vacuum: If the lines weren’t properly evacuated, residual air and moisture can severely impact performance. This also requires professional intervention.
Water Leaking from Indoor Unit
- Clogged Drain Line: The most common cause. Check for kinks or blockages in the condensate drain hose. Clear any debris.
- Improper Slope: Ensure the drain line has a continuous downward slope to allow water to flow out by gravity.
- Frozen Coil: Dirty filters or low refrigerant can cause the indoor coil to freeze, leading to leaks as it thaws.
Unusual Noises
- Vibration: Ensure both units are securely mounted and level. Check for loose panels or components.
- Fan Obstruction: Debris in the outdoor fan or a loose fan blade can cause noise.
- Refrigerant Gurgling: A small amount of gurgling can be normal, but excessive noise might indicate air in the system or improper refrigerant charge.
Maintenance Tips
Regular maintenance will keep your mini split AC running efficiently for years.
- Clean Filters: Clean or replace the indoor unit’s air filters every 1-3 months, depending on usage. Dirty filters restrict airflow and reduce efficiency.
- Clear Outdoor Unit: Keep the area around the outdoor unit free of debris, leaves, and vegetation to ensure proper airflow. Occasionally rinse the outdoor coil with a hose.
- Check Drain Line: Periodically ensure the condensate drain line is clear and flowing freely.
Conclusion
Congratulations! You’ve successfully navigated the process of how to install a mini split AC system. This guide has provided you with the detailed steps, practical tips, and crucial safety information needed to tackle this significant home improvement project. By taking the time to plan carefully, gather the right tools, and follow each instruction meticulously, you’ve not only saved money on installation costs but also gained valuable knowledge and confidence in your DIY abilities.
Enjoy the customized comfort and energy efficiency that your new mini split AC provides. Remember, while a DIY installation is rewarding, don’t hesitate to consult a licensed professional for any steps you’re unsure about, especially regarding electrical work or if you encounter persistent issues. Your comfort and safety are paramount.
Now, sit back, relax, and savor the perfectly tempered environment you’ve created yourself!