
Quick Fix: Replacing air cooler pads is simple. Turn off the unit, find the old, crusty pads, swap them with new, wet ones, and turn it back on. This quick swap brings back that cool, refreshing breeze fast!
Is your air cooler blowing warm air? Are your energy bills creeping up even though you are barely staying cool? It happens to all of us. Sometimes, the easiest fix for a struggling air conditioner or cooler is hiding right inside the unit. Don’t worry about complicated repairs or calling a pricey technician just yet. I’m Jack from ACReviewHub.com, and I promise to walk you through this easy swap step-by-step. Next, we will get your unit running like new again.
Why Do Air Cooler Pads Need Changing?
Air coolers, often called swamp coolers, work differently than regular AC units. They use water evaporation to cool the air. This process needs special pads to work right. These pads soak up the water and let air pass through them.
Over time, these pads get dirty. Dust, minerals from hard water, and mold can build up. A clogged pad cannot absorb water well. This means less evaporation happens. Less evaporation means less cool air comes out of your machine. It’s like trying to breathe through a dirty straw.
Signs It’s Time for New Cooler Pads
Knowing when to act saves you money and comfort. Look out for these clear signs that your pads are past their prime. They are your unit’s way of telling you it needs help.
- The air coming out is not as cold as it used to be.
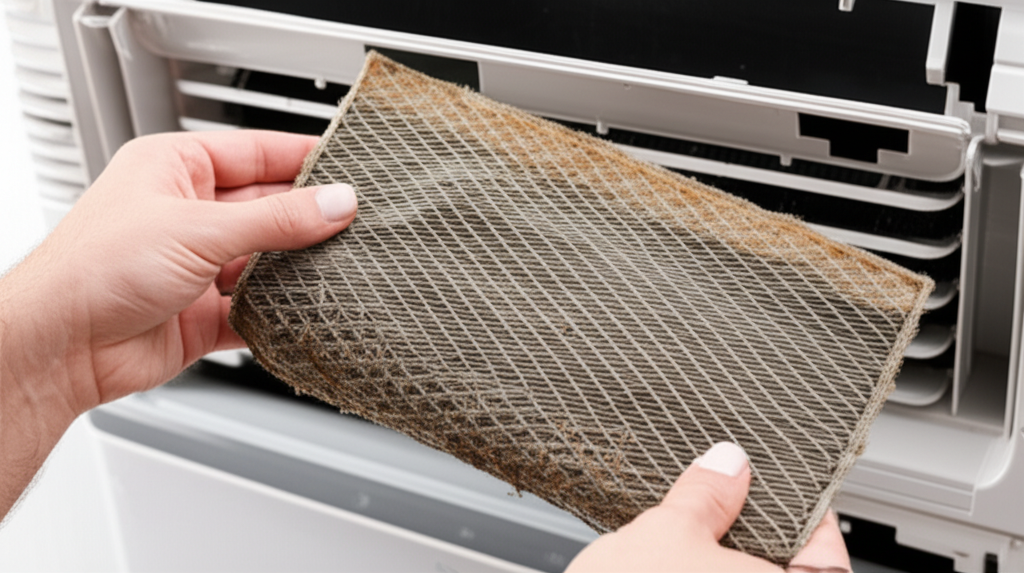
- You see visible slime, scale, or heavy mineral deposits on the pads.
- The pads feel hard, crusty, or they never seem to get fully wet.
- You notice a musty or swampy smell when the unit runs.
- Your energy use goes up, but your comfort level goes down.
Gather Your Tools: Getting Ready for the Swap
This job is easy, but being prepared makes it even faster. You do not need a full toolbox for this maintenance task. Think of this like changing a big air filter in your home furnace.
Here is what you should have ready before you start:
- New replacement pads (Make sure they match your cooler model!)
- A screwdriver or nut driver (Check your manual if you are unsure).
- A bucket or old towel for drips.
- Rubber gloves (Optional, but good for keeping hands clean).
- Water source nearby for wetting the new pads.
Step-by-Step Guide: How to Replace Air Cooler Pads
Follow these simple steps to complete the replacement safely and quickly. We will go slow so you don’t miss a thing.
Step 1: Safety First – Turn Everything Off
This is the most important step. Always unplug your air cooler from the wall socket. If you can’t unplug it easily, turn off the circuit breaker that controls the outlet. Never work on a unit that has power running to it.
Step 2: Empty the Water Reservoir
Most coolers have a drain plug or a hose near the bottom. Place your bucket underneath. Open the drain and let all the old, standing water empty out. This prevents spills when you move the unit.
Step 3: Locate and Access the Pads
Cooler pads are usually held in place by metal screens or side panels. Look at the sides of your unit. You will see screws or clips holding the access panels on. Use your screwdriver to carefully remove the screws or release the clips.
Step 4: Remove the Old, Dirty Pads
Gently slide or lift the old pads out. They can be heavy because they are full of water and debris. Be careful not to drop them inside the unit. Place the old pads directly into your bucket or on an old towel.
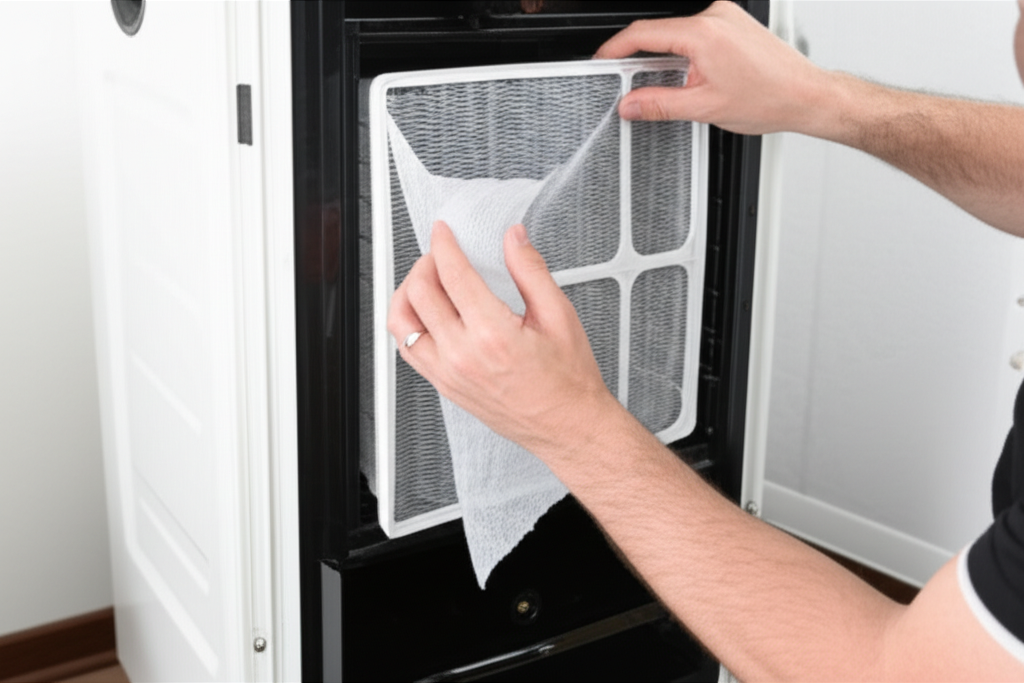
Step 5: Install the Brand New Pads
Take your new pads. If they came folded, gently unfold them. Slide the new pads into the housing where the old ones were. Make sure they fit snugly and sit flat against the water distribution system. The fit should be snug but not jammed.
Step 6: Secure the Panels and Refill
Put the access panels back on. Screw them in or clip them securely. You don’t want air leaking out later. Now, refill the water tank with fresh, clean water. Check your manufacturer’s guidelines for the correct water level.
Step 7: Test Your Cool Air Flow
Plug the unit back in. Turn it on low speed first. Let it run for about 15 to 30 minutes. The new pads need time to fully soak up the water. You should soon feel a noticeable difference in how cool the air is blowing!
Cooler Pad Buying Tips: Getting the Right Fit
Buying the wrong pad size is a common mistake that wastes time and money. Always measure twice before you order online or head to the store.
Here are a few things to consider when purchasing replacements:
- Measure Everything: Note the height, width, and thickness of your old pad.
- Check Material: Most coolers use Aspen wood fiber or synthetic honeycomb material. Stick to the type your manufacturer recommends.
- Model Number Matters: If possible, search using your cooler’s exact model number for guaranteed compatibility.
To help you understand how different cooling systems compare, look at this basic guide:
| Cooling Method | How It Works | Best For |
|---|---|---|
| Evaporative Cooler (Swamp Cooler) | Uses water evaporation and pads. | Dry, hot climates. |
| Standard AC (Compressor Based) | Uses refrigerant to remove heat and humidity. | Humid climates or very precise cooling. |
Simple Tips for Longer Pad Life
You just spent time and money on new pads; you want them to last! A little care goes a long way in keeping your cooler efficient.
Here is a simple maintenance checklist:
- Drain Weekly: Even if you don’t replace the pads, drain the reservoir every week or two. This prevents mineral buildup from sitting stagnant.
- Use Distilled Water (If Possible): If you have very hard tap water, using distilled water reduces mineral scaling dramatically.
- Clean Annually: Before storing your cooler for the winter, run a cleaning cycle if your unit has one, or gently scrub the pads with a soft brush and vinegar solution.
- Don’t Run Dry: Never run your cooler when the water level is too low. Running the pump without water can damage it, and dry pads will quickly degrade.
For more in-depth efficiency tips, the Department of Energy has great resources on cooling technologies. Check out Energy.gov on Evaporative Coolers.
Frequently Asked Questions (FAQ) for Beginners
Here are quick answers to the questions I hear most often about air cooler maintenance.
- How often should I change my air cooler pads?
- In heavy use areas, change them once per cooling season. If you notice a big drop in performance, change them sooner.
- Can I just clean the old pads instead of replacing them?
- You can scrub off light scale, but if they are crumbly or permanently stained, replacement is always better for performance.
- What if my cooler still doesn’t feel cold after changing the pads?
- Check if the water pump is running and if the pads are getting fully soaked. If the pump is running but the pads are dry, the water line might be clogged.
- Why does my cooler smell musty now?
- That means mold or mildew is growing. Always use fresh water, and consider draining it every few days to prevent stagnation.
- Do I need to replace the filter screens too?
- Usually, no. The main pads are the part that needs replacing. Check the screens for large holes, but they often last several years.
You see? Replacing those air cooler pads is totally manageable. It’s one of the simplest maintenance tasks you can do to keep your home feeling great without wasting energy. Stay consistent with simple checks like draining the water, and your cooler will thank you with years of reliable, cool air. Keep up the great work, and stay comfortable!