
Quick Summary: Cleaning mini split filters is easy! Simply turn off the unit, pop open the front panel, carefully remove the reusable filters, rinse them with warm water (no harsh soap!), let them air dry completely, and slide them back in. Do this every 30–90 days for better cooling and lower bills.
Is your mini split running but not cooling like it used to? Maybe you noticed a funny smell when you turn it on. These are common signs that the filters are clogged up. Don’t worry about confusing AC jargon or expensive service calls right now. I’m Jack from ACReviewHub.com, and I’m here to show you exactly how to handle this simple fix.
Cleaning these filters yourself is one of the best ways to save money and keep your air fresh. We are going to walk through this process step-by-step. By the time we are done, you will feel totally confident taking care of your system.
Why Cleaning Your Mini Split Filters Matters So Much
Your mini split uses these filters to catch dust, pet dander, and other tiny bits floating in your air. Think of them as the lungs of your AC unit.
When those lungs get clogged, two main things happen. First, the AC has to work much harder to push air through the dirt. This means higher electric bills for you.
Second, blocked airflow makes the unit freeze up or just blow lukewarm air. A clean filter ensures smooth airflow, keeping you cool efficiently.
The Essential Toolkit: What You Need Before You Start
You don’t need a toolbox full of fancy gear for this job. Most of what you need is probably already under your sink. Keep it simple!
- A small step stool or sturdy chair (if needed for reach).
- A soft brush or cloth (for gently sweeping heavy dust).
- Mild dish soap (optional, only if filters are greasy or very dirty).
- A sink, bathtub, or hose for rinsing.
- Fresh, clean water (room temperature or slightly warm).
Step-by-Step Guide: How To Clean Mini Split Filters Safely
Safety first! Always make sure the power is completely off before you touch the internal parts of your unit. We are only dealing with the reusable filters here, not the coils.
Step 1: Power Down the System
Use your remote control to turn the unit completely off. For extra peace of mind, you can flip the breaker switch that controls the mini split power. This prevents any accidental startup while your hands are inside.
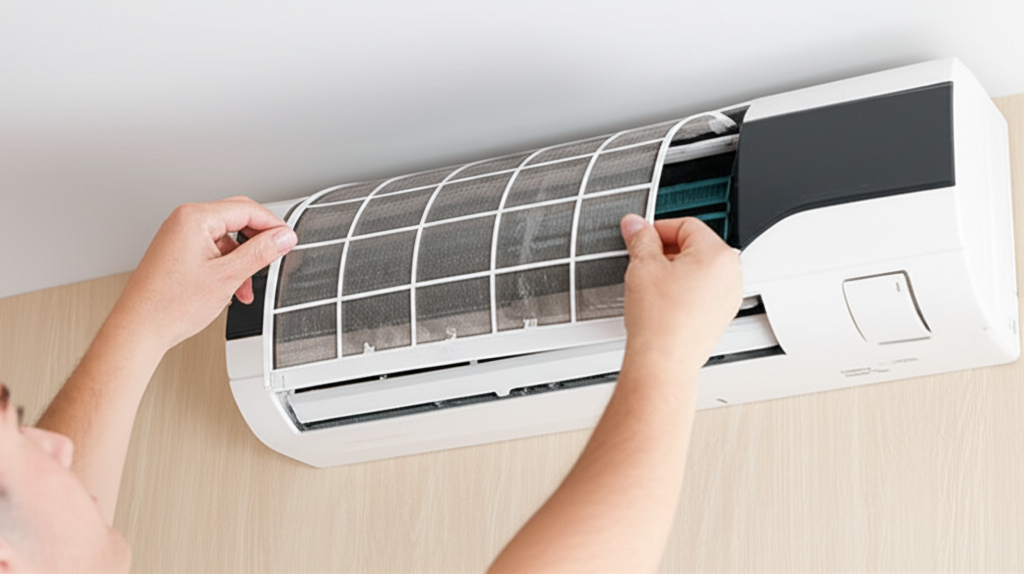
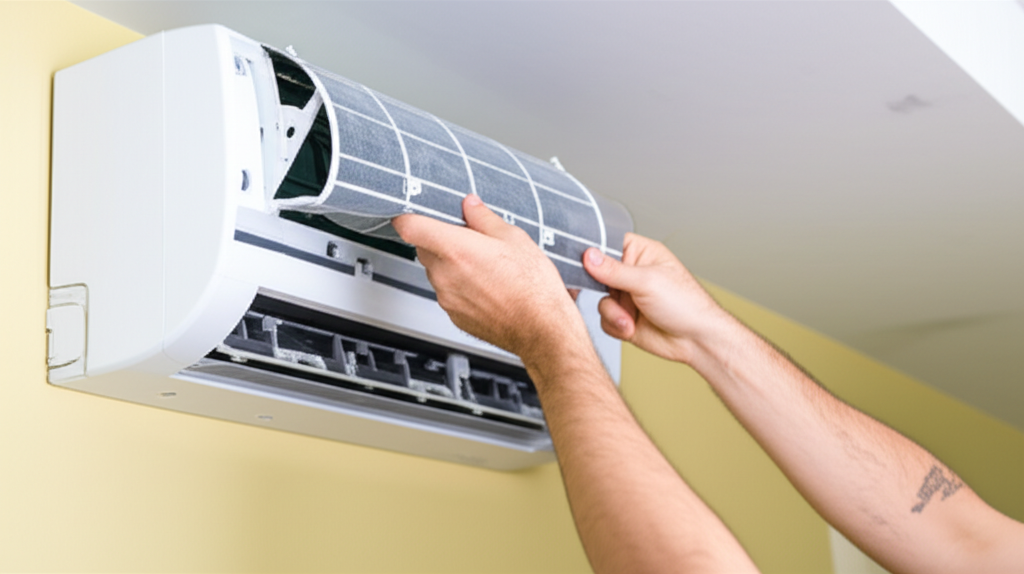
Step 2: Open the Indoor Unit Panel
Look for the seam along the bottom edge of the indoor wall unit (the part that blows the air). Gently place your fingers underneath or on the sides and lift up. Most panels swing open easily, similar to lifting the hood of a car.
Step 3: Locate and Remove the Filters
Once the panel is open, you will immediately see the long, rectangular filters. They usually look like thin mesh screens, often gray or black. There might be a small tab or handle; gently slide or unhook them straight out of their slots.
Step 4: Shake Off the Heavy Dust
Take the filters outside or over a trash can. Gently tap them or use a soft brush to remove the thickest layers of dust. This prevents clogging your sink later.
Step 5: Rinse the Filters Thoroughly
Take the filters to your sink or tub. Use lukewarm running water to rinse them from the clean side toward the dirty side. This pushes the dirt out the way it came in. If they are really greasy, use a tiny bit of mild dish soap, but rinse it all away completely.
Step 6: Allow Filters to Air Dry (Crucial Step!)
This is the most important part! Never put damp filters back into the unit. Moisture encourages mold and mildew growth, which defeats the whole purpose of cleaning! Lay them flat or hang them somewhere with good airflow until they are 100% dry to the touch.
Step 7: Reinstall and Close Up
Once bone dry, carefully slide the filters back into their slots until they click or sit securely. Gently close the front panel until it latches shut. Turn the power back on and enjoy that fresh, cool air!
Maintenance Schedule: How Often Should I Clean These?
How often you clean depends on how you use your AC and what’s in the air. For most folks, sticking to a regular schedule keeps things running smoothly. Consistency is key!
| Usage Level | Recommended Cleaning Frequency | Notes |
|---|---|---|
| Light Use (Seasonal) | Every 90 days | Perfect for homes used only occasionally during summer. |
| Average Use (Daily) | Every 45–60 days | Standard recommendation for most year-round homeowners. |
| Heavy Use (Pets, Dust, Allergies) | Every 30 days | If you have heavy smokers, multiple pets, or live near a dusty construction site. |
For more in-depth energy savings tips related to air quality and system efficiency, check out the Department of Energy’s advice on home cooling:
Energy Saver: Air Conditioners and Cooling
Troubleshooting Common Filter Cleaning Mistakes
Sometimes even with the best intentions, we make small slips. Here are the most common mix-ups beginners make when cleaning their mini splits.
| Mistake Made | Why It Causes Problems |
|---|---|
| Using hot water or a harsh cleaner | Can warp the plastic frame or damage the filter mesh material. |
| Putting damp filters back in | Leads to musty smells, mold growth, and potential coil damage inside the unit. |
| Forcing the panel shut | Risk of breaking the delicate hinges or the plastic clips holding the panel in place. |
| Cleaning the actual cooling coils | Only the outer mesh filters should be rinsed. The metal coils inside require professional cleaning. |
Remember, the goal is gentle cleaning, not scrubbing! If you ever notice the metal fins behind the filters look dirty, that usually means it’s time to call a pro for a deep coil cleaning.
When Do I Need to Replace My Filters Instead of Cleaning?
Most mini split systems come with durable, reusable nylon or plastic mesh filters. These are designed to last for years with proper cleaning. However, some specialized filters do need replacement.
- Activated Carbon or HEPA Filters: If your unit has these extra-filtration layers installed behind the main mesh filters, they are usually disposable and cannot be washed. Check your owner’s manual for replacement schedules (often every 6–12 months).
- Visible Damage: If the mesh is torn, ripped, or the plastic frame is cracked, it’s time to order a replacement set specific to your model number.
Frequently Asked Questions (FAQ)
Q: Can I use a hairdryer to dry my filters faster?
A: Nope! Stick to air drying. High heat from a hairdryer can melt or warp the fine mesh of the filter, making it less effective.
Q: My filter looks clean, but my AC smells musty. What gives?
A: The smell is likely coming from mold or mildew growing on the wet evaporator coils behind the filter. A clean filter helps prevent this, but you might need a professional coil cleaning if the smell persists.
Q: How do I find my mini split model number to order new specialized filters?
A: The model number is usually printed on a sticker located on the bottom or side edge of the indoor unit, often visible when the front panel is open.
Q: Is it okay to use a vacuum cleaner on the filters instead of rinsing?
A: Vacuuming is a great pre-clean step, especially for heavy dust. But rinsing with water is necessary to pull out oils and the very finest particles the vacuum misses.
Q: Can I wash the filters in my dishwasher?
A: While some manufacturers say it’s okay on a low setting, I always advise against it. The high heat and harsh detergents in a dishwasher can damage the material over time. Hand rinsing is safer!
Q: How often should I check the remote batteries?
A: This isn’t about cleaning, but it’s good to know! Change them twice a year, maybe when you switch from heating season to cooling season, so you never lose control.
See? That wasn’t scary at all! Maintaining your mini split is really just about forming a few simple habits. By taking a few minutes every month or two to clean those filters, you are doing the single most effective thing to keep your energy bills low and your indoor air quality high.
Keep up the great work, stay cool, and don’t hesitate to check back if any other AC questions pop up!