
Quick Summary: To test an AC contactor, safely shut off power, locate the contactor in the outdoor unit, and use a multimeter to check for continuity across the switch points when the thermostat calls for cooling. If it clicks on but has no power, the contactor is the likely culprit.
Is your air conditioner blowing warm air when it should be cold? That is frustrating, especially when the sun is shining hot outside. Many homeowners worry about complex electrical parts inside their AC unit. You might think you need an expensive technician right away. But don’t worry; we can look at one key part together. This guide will show you how to check the AC contactor simply and safely. You will feel much more confident about your AC system after learning this trick.
What is an AC Contactor and Why Does It Matter?
Think of the contactor as a heavy-duty light switch for your outdoor AC unit, often called the condenser. When your thermostat tells the system to cool down, it sends a small signal to the contactor. This contactor then closes, allowing the big 240-volt power needed to run the big fan and compressor. If this switch fails, your AC stops running, even if the inside fan keeps blowing.
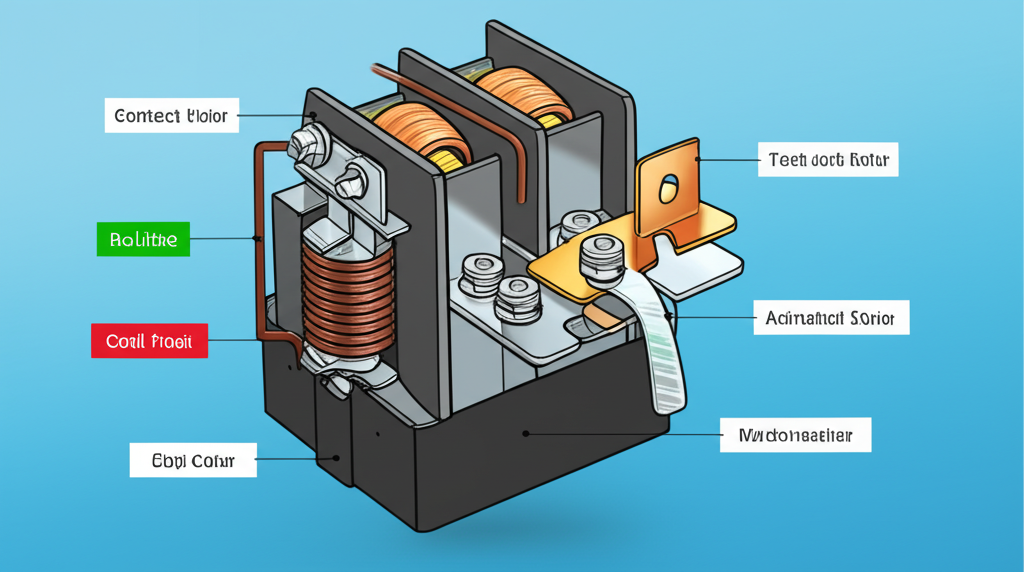
The contactor is usually a small, rectangular box found inside the metal cabinet of your outside unit. It has thick wires coming in and thick wires going out. You might hear a distinct “click” sound when your AC turns on; that is often the contactor engaging. If you hear no click, or if you hear a buzzing sound, the contactor might be failing.
Safety First: Turning Off the Power
Working near high voltage is serious business. We must always shut off the power before touching anything inside the outdoor unit. Safety is the most important step here, friend.
Follow these simple steps to ensure the area is safe:
- Find your main electrical panel (breaker box) for your home.
- Locate the breaker switch labeled for your AC unit or “Condenser.”
- Flip this switch firmly to the OFF position. This cuts all power to the outside unit.
- Go outside to the unit itself. You will see a small metal box near the top or side—this is the disconnect box.
- Pull the handle or switch inside this disconnect box completely OFF. This is your second layer of safety.
Always double-check that the power is off. We will use a multimeter later to confirm, but turning off both the breaker and the disconnect is non-negotiable.
Gathering Your Tools for Testing
You do not need a huge toolbox for this simple test. Having the right tool makes the job easy and safe. You only need one special tool for checking the contactor.
Here are the few items you will need:
- Multimeter: This tool measures voltage and continuity. Make sure it has probes that can handle high voltage measurements.
- Screwdriver Set: You will need this to remove the service panel on the outdoor unit.
- Safety Glasses: Protect your eyes just in case!
If you are new to multimeters, just know that we will be using the setting that looks like a sound wave or a simple resistance symbol (Ohms) for the continuity test later.
Locating the AC Contactor
Once the power is off, it is time to find the part. The contactor lives inside the metal casing of the outside unit.
- Remove the screws holding the main service panel on the side of the condenser unit. Be gentle as you lift the cover off.
- Inside, you will see wires and a large, often black, box mounted near the wiring connections. This is your contactor.
- It will have thick wires attached. One set of wires brings the power in (Line side), and another set sends power out to the fan and compressor (Load side).
Step-by-Step Guide: Testing the Contactor
We are going to test two main things: first, ensuring no power is present when the system is off, and second, checking if the switch itself works when it should be closed.
Step 1: Confirming Power is OFF (Voltage Test)
Even though you flipped the switches, let’s be absolutely sure before touching any terminals.
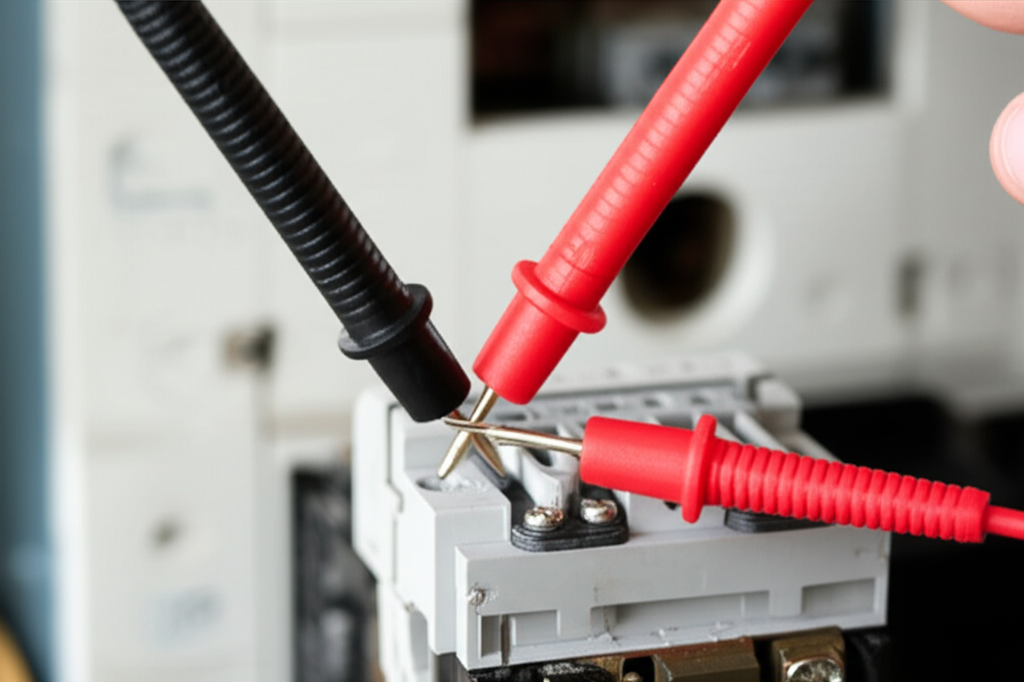
- Set your multimeter to measure AC Voltage (V~), usually to the 600V range.
- With the power still OFF, carefully touch one probe to the incoming (Line) terminal and the other probe to the outgoing (Load) terminal on the contactor.
- The meter should read 0 volts. If it reads 240V (or close to it), stop immediately! The disconnect or breaker is still live. Go back and find the correct power source to turn off.
Step 2: Testing for Continuity (When Power is ON and Thermostat is Calling)
This test checks if the switch closes properly. This requires turning the power back ON temporarily, which is the trickiest part.
- Keep the multimeter set to continuity mode (the setting that beeps or shows low resistance).
- Carefully replace the service panel cover, but leave the disconnect switch OFF for now.
- Turn the AC breaker back ON at your main panel.
- Go inside and set your thermostat to COOL and set the temperature very low (e.g., 60°F) so the AC kicks on.
- Quickly go back outside and flip the disconnect switch ON. You should hear the “click” of the contactor closing.
- Now, set the multimeter back to measure low resistance (Ohms, $Omega$).
- Place the probes on the two main output terminals (the Load side).
What you are looking for is a reading very close to zero Ohms (ideally 0.1 to 0.5 $Omega$). This means the internal switch is fully closed, allowing electricity to pass through. If you read “OL” (Open Line) or very high resistance, the contactor is stuck open or the points are burned, and it needs replacement.
Step 3: Checking the Coil Voltage (If it doesn’t click)
If you heard no click at all when you turned the power on, the contactor coil might not be getting the signal. This signal is low voltage (usually 24V AC).
- Turn the power OFF again (Breaker and Disconnect).
- Locate the small, low-voltage wires attached to the contactor coil terminals (often labeled A1 and A2).
- Turn the power back ON (Breaker and Disconnect).
- Set your multimeter to measure low AC Voltage (e.g., 200V range).
- Test across these two small coil terminals. You should read around 24V AC when the thermostat is calling for cooling.
If you read 24V but the contactor does not click, the contactor coil itself has likely burned out, and you need a new one. If you read 0V, the problem is upstream—likely the thermostat or the control board.
Contactor Test Results At a Glance
Here is a simple way to summarize what you found during your testing:
| Symptom Heard/Observed | Voltage Reading (Load Side) | Contactor Status |
|---|---|---|
| Loud click, then cooling works. | 240V present. | Good. |
| No click, no cooling. | 0V present. | Contactor coil failed OR no 24V signal. |
| Humming/Buzzing noise, no cooling. | 0V present. | Points are stuck open/welded internally. Needs replacement. |
For more detailed information on HVAC components, the Department of Energy offers great resources on home energy use, including AC efficiency: Energy.gov HVAC Info.
When to Call a Professional AC Expert
Testing the contactor is a great first step for beginners. However, some things are best left to the pros who deal with high voltage daily.
- If you are uncomfortable testing live wires, stop immediately and call a technician.
- If you find 240V present on the line side, but 0V on the load side, and you also read 24V at the coil (meaning the contactor should be working), it is time to call for help.
- If you replace the contactor and the unit still doesn’t work, the issue is likely the thermostat, control board, or a tripped overload switch on the compressor.
Remember, replacing a contactor is usually straightforward, but handling live 240V wires requires expertise and caution. Never hesitate to call a licensed HVAC technician if you feel unsure.
FAQ: Simple AC Questions Answered
Here are some common questions I hear about AC troubleshooting:
- My AC won’t turn on at all. Where should I look first? Check your thermostat batteries and ensure the breaker is on. That solves most “no power” issues!
- What is the difference between the fan running and the compressor running? The fan is the indoor part, blowing air over the cold coils. The compressor is the big pump outside that makes the coils cold. If only the fan runs, the outside unit isn’t kicking on, often pointing to the contactor or capacitor.
- Can I clean the contactor points if they look dirty? While some old technicians used to sand them, modern contactors are not designed for field repair. If the points are pitted or burned, you must replace the entire contactor.
- How often should I check my outdoor unit? Give it a visual check every spring before heavy use. Make sure nothing is blocking airflow around it.
- Is it okay if my contactor buzzes sometimes? A slight, momentary buzz when it first engages is normal. Persistent, loud buzzing means it is struggling or failing and needs replacement soon.
Taking a few minutes to understand simple components like the contactor puts you in control of your home comfort. You have learned how to safely check the main switch for your outdoor AC unit. Keep practicing these simple checks, and you will save time and money on future service calls. Stay cool, and remember, AC care doesn’t have to be confusing!