
Regular cleaning of your portable AC filter keeps your unit running efficiently and improves indoor air quality. This guide walks you through each step with simple tools and safe practices. Skip the hassle and boost performance with this essential maintenance routine.
Key Takeaways
- Clean your filter every 2–4 weeks for optimal performance and air quality.
- Use mild soap and water—never harsh chemicals or bleach on the filter.
- Let the filter dry completely before reinstalling to prevent mold.
- Check for visible damage like tears or warping that may require replacement.
- Schedule deep cleaning monthly if you live in dusty or high-pollen areas.
- Refer to your owner’s manual for model-specific cleaning instructions.
- Clean the exterior grille and vents along with the filter for full airflow.
Quick Answers to Common Questions
How often should I clean my portable AC filter?
Clean your portable AC filter every 2–4 weeks during regular use. If you have pets, allergies, or live in a dusty area, do it more frequently.
Can I clean the filter with a regular vacuum?
Yes, use a vacuum with a brush attachment to gently remove loose dust. Avoid strong suction that could tear the filter.
Will cleaning improve my AC’s cooling?
Absolutely. A clean filter improves airflow, reduces strain on the unit, and can make your portable AC cool more efficiently.
What if my filter smells after cleaning?
Soak it in a baking soda solution for 30 minutes, then rinse and dry thoroughly. Persistent odors may mean mold—replace the filter.
Is it safe to use bleach on the filter?
No. Bleach damages filter material and can release harmful fumes. Use only mild soap and water.
📑 Table of Contents
Portable AC Filter Cleaning Guide: Keep Your Cool with Clean Air
Imagine this: It’s a hot summer afternoon, and your portable AC has been running nonstop. But instead of blowing fresh, cool air, it’s pushing out a weak breeze with a faint, musty smell. You check the display—nothing’s wrong. Yet something feels off. The truth? Your portable AC filter is clogged with dust, pet dander, and pollen, restricting airflow and straining the unit. This is more than an inconvenience—it’s a sign that your portable AC filter cleaning is overdue.
Cleaning your portable AC filter isn’t rocket science, but it’s one of the most effective ways to maintain efficiency, extend the life of your unit, and breathe easier indoors. In this complete guide, we’ll walk you through every step—from gathering the right tools to troubleshooting common issues. Whether you’re a first-time user or a seasoned AC owner, this portable AC filter cleaning guide will help you keep your unit running like new.
Why Filter Cleaning Matters
Your portable AC filter acts like a shield, trapping dust, allergens, and debris before they circulate through your room. Over time, these particles build up, reducing airflow and making your unit work harder. This not only increases energy bills but can also lead to poor air quality and reduced cooling performance.
Visual guide about Portable Ac Filter Cleaning Guide
Image source: paulstravelpictures.com
The Hidden Dangers of a Dirty Filter
A clogged filter doesn’t just slow things down—it can cause bigger problems. When airflow is restricted, the evaporator coil inside the unit can get too cold, leading to ice buildup. This forces the AC to shut off temporarily, interrupting cooling cycles. Plus, mold and bacteria can grow in damp, dirty filters, especially in humid climates, releasing unpleasant odors and potentially harmful spores into your home.
Energy Efficiency and Lifespan
Did you know a clean filter can improve your portable AC’s efficiency by up to 15%? That means lower electricity bills and less strain on the compressor. Regular maintenance, including portable AC filter cleaning, helps your unit last longer and perform reliably during peak heat.
What You’ll Need Before You Start
Before diving in, gather these simple tools. You don’t need expensive equipment—just a few household items and a little patience.
Visual guide about Portable Ac Filter Cleaning Guide
Image source: paulstravelpictures.com
- Soft brush or vacuum with brush attachment – for loosening dust from the filter
- Warm water – lukewarm is best to avoid warping the filter
- Gentle dish soap or mild laundry detergent – no harsh chemicals
- Towel or clean cloth – for drying
- Bucket or sink – for soaking (if your filter is washable)
- Owner’s manual – to confirm filter type and location
Pro tip: Avoid using bleach, ammonia, or abrasive scrubbers—they can damage the filter material and reduce its effectiveness over time.
Step-by-Step: How to Clean Your Portable AC Filter
Now that you’re ready, let’s get into the process. This method works for most reusable filters, including pleated, mesh, and washable foam types.
Visual guide about Portable Ac Filter Cleaning Guide
Image source: paulstravelpictures.com
Step 1: Power Down and Unplug
Safety first! Turn off your portable AC and unplug it from the outlet. This prevents accidental startup and protects you from electrical hazards.
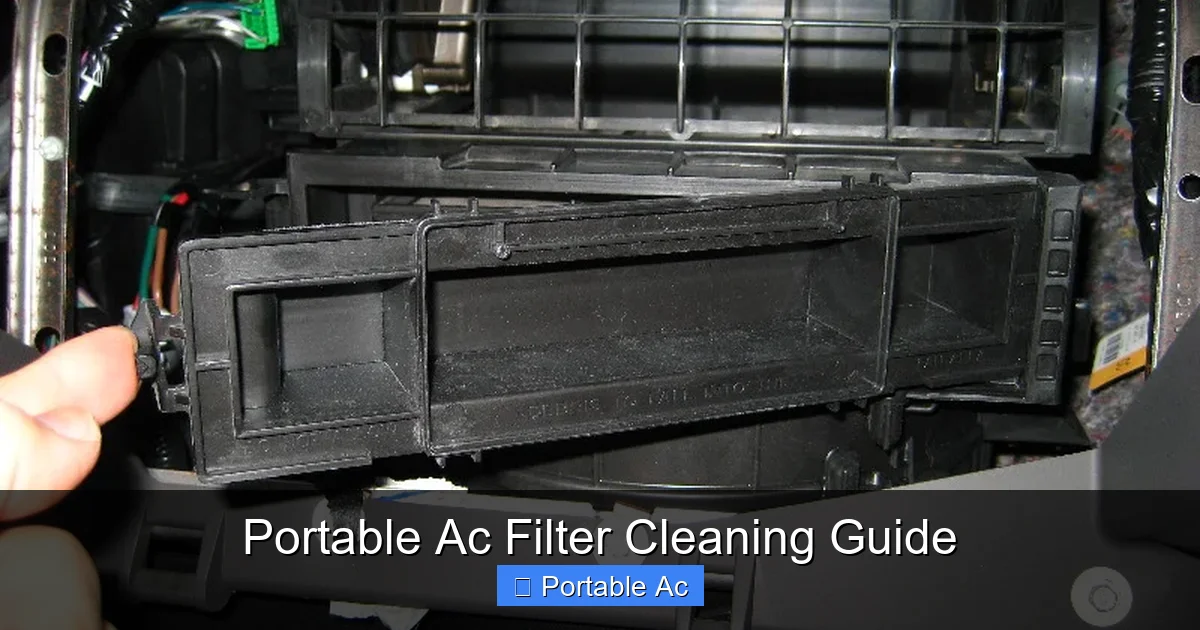
Step 2: Locate and Remove the Filter
Open the front panel or access door of your portable AC. Most models have a filter drawer or grille at the front or side. Gently slide it out. Some units have filters behind a removable panel—check your owner’s manual if you’re unsure. If you’re using a portable AC cleaning kit, it may include tools to help remove stubborn filters.
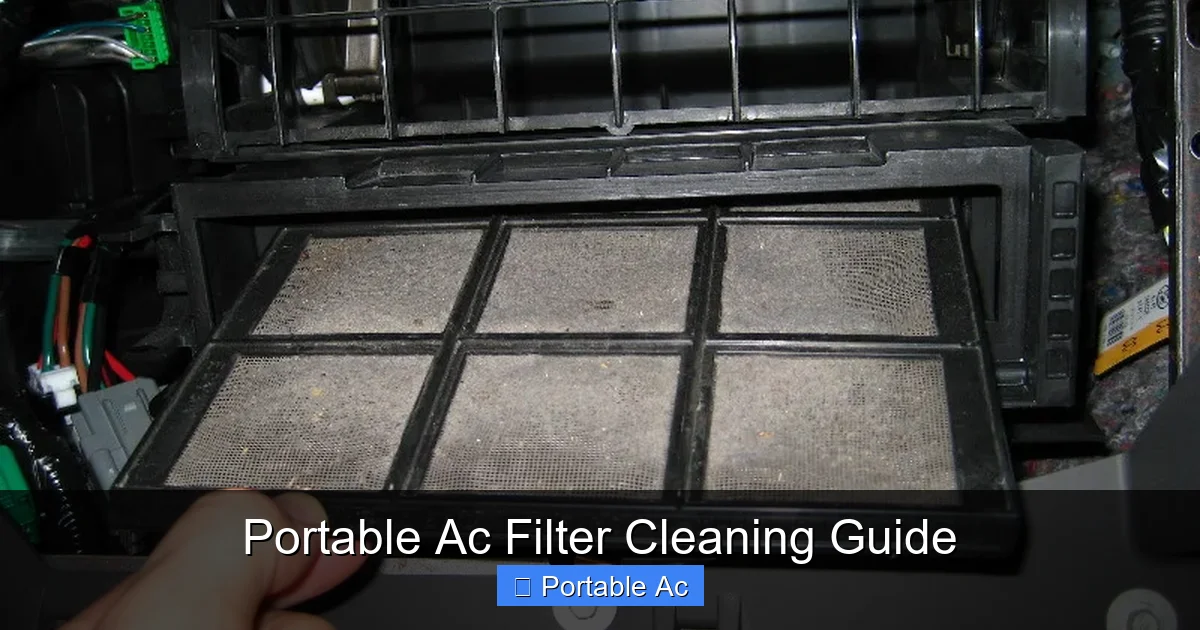
Step 3: Shake Off Loose Debris
Take the filter outside or over a trash can and give it a firm shake. This removes large dust clumps. For extra help, use a vacuum with a brush attachment to gently suck away surface dirt. Be careful not to tear the filter—especially if it’s made of fine mesh.
Step 4: Wash with Soap and Water
Fill a sink or bucket with warm water and add a few drops of mild soap. Submerge the filter and let it soak for 10–15 minutes. Then, use your hands or a soft brush to gently scrub both sides. Pay attention to corners and folds where dust tends to collect.
💡 Tip: Never twist or wring out the filter—this can damage the fibers. Instead, press gently to remove excess water.
Step 5: Rinse Thoroughly
Rinse the filter under cool running water until all soap is gone. Make sure no suds remain, as residue can attract more dirt and reduce airflow.
Step 6: Dry Completely
This step is critical. Lay the filter flat on a clean towel in a well-ventilated area. Let it air dry for at least 24 hours. Never reinstall a damp filter—it creates the perfect environment for mold and mildew.
🚫 Do NOT use a hair dryer or oven to speed up drying. Heat can warp or melt the filter material.
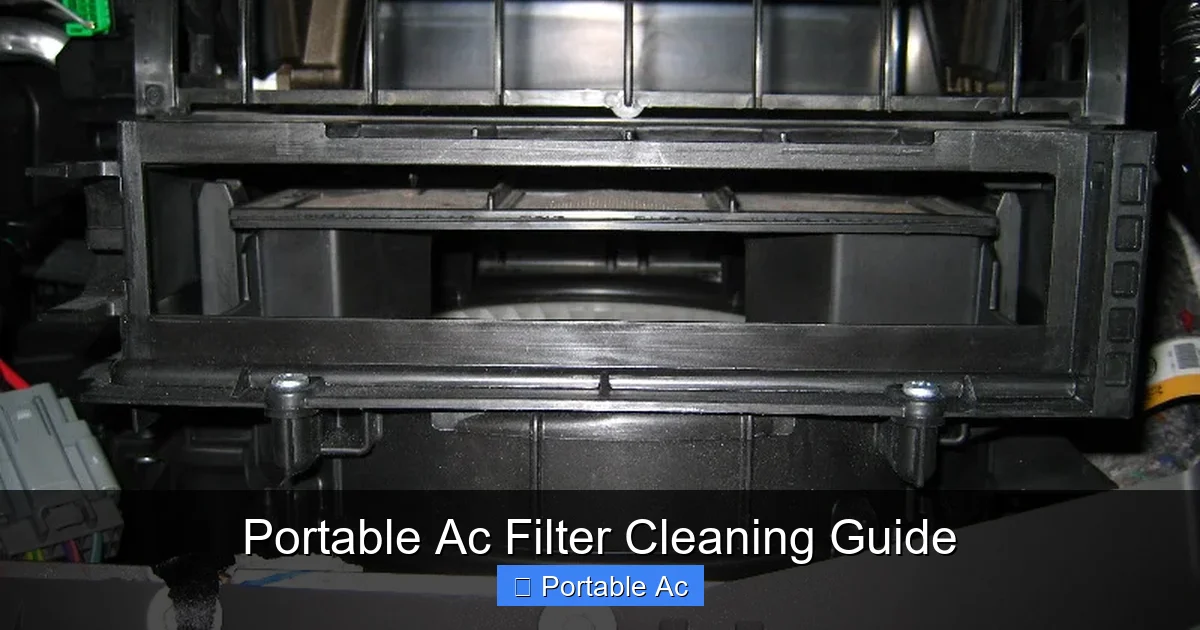
Step 7: Reinstall the Filter
Once fully dry, slide the filter back into place. Make sure it’s seated properly and the drawer closes smoothly. Plug in your unit and turn it on. You should notice improved airflow and cooling almost immediately.
When to Clean vs. Replace Your Filter
Not all filters are washable—and that’s okay. Some portable ACs use disposable filters that must be replaced every 1–3 months, depending on usage. Check your manual to confirm whether yours is reusable or needs replacement.
Signs You Need a New Filter
- The filter is torn, warped, or discolored
- Cleaning doesn’t improve airflow
- You notice mold spots or a strong musty smell even after cleaning
- The filter is more than 6 months old (even if it looks clean)
Replacing a worn filter is just as important as cleaning. If you’re unsure, consider keeping a spare filter on hand. You can find compatible replacements in our How to Replace AC Filter Shocking Guide.
Advanced Tips for Better Air Quality
While cleaning your portable AC filter regularly is essential, there are extra steps you can take to keep your air as fresh as possible.
Deep Clean the Exterior Vents
Use a vacuum or compressed air to clear dust from the intake and exhaust vents. Blocked vents restrict airflow and make your unit work harder. This is especially important if you’ve stored your portable AC and are bringing it back into use.
Use a Baking Soda Solution (Optional)
For stubborn odors, mix 1 tablespoon of baking soda with a cup of warm water. Dip a cloth in the solution and wipe the filter surface. Baking soda neutralizes odors without harsh chemicals.
Schedule Seasonal Maintenance
Set a reminder to clean your filter every 2–4 weeks during peak cooling months. In dusty or pet-heavy homes, you may need to do it more often. Consider pairing this with a full portable AC maintenance guide for comprehensive care.
Common Mistakes to Avoid
Even with the best intentions, it’s easy to make small errors that reduce effectiveness or damage your unit.
- Skipping drying time – leads to mold and reduced efficiency
- Using hot water – can warp filter material
- Forgetting to clean the drain pan – clogged drains cause water leaks
- Ignoring error codes – some units alert you when the filter is dirty
If your portable AC starts showing error codes, don’t panic. Check our How to Fix Portable AC Error Codes Urgent Guide for quick solutions.
Frequently Asked Questions
Can I use a dishwasher to clean my portable AC filter?
No, dishwashers use high heat and strong detergents that can warp or melt the filter. Always hand-wash with mild soap and warm water.
How long does it take for a portable AC filter to dry?
Allow at least 24 hours for complete drying in a well-ventilated area. Drying time may be longer in humid climates.
What type of filter should I use for my portable AC?
Check your owner’s manual. Most portable ACs use either washable mesh or pleated filters. Disposable filters need regular replacement.
Will a dirty filter cause my AC to freeze?
Yes. Restricted airflow cools the evaporator coil too much, causing ice buildup. Cleaning the filter often prevents this issue.
Can I clean the filter while the AC is running?
No. Always power off and unplug your unit before removing or cleaning the filter to ensure safety.
How do I know if my filter is clogged?
Signs include weak airflow, musty smells, higher energy bills, or the AC turning off unexpectedly. A visual check can also reveal heavy dust buildup.