
Portable AC venting through dryer vent is a smart, cost-effective way to cool your space without drilling new windows or installing permanent systems. This method works best with the right hose adapter and proper sealing techniques. You’ll save money, avoid complex installations, and still get strong airflow. Just make sure your dryer vent is clean and accessible. With a few simple tools, you can turn your portable AC into a powerful cooling machine—even in rooms without ideal exhaust options.
Key Takeaways
- Safety first: Never block the dryer vent completely or use it if it’s damp or moldy. Always ensure airflow isn’t restricted.
- Use the right adapter: A universal dryer-to-portable AC vent kit makes installation easy and secure.
- Seal gaps tightly: Prevent warm air leaks by using foam tape or duct sealant around connections.
- Clean the dryer vent: A clogged vent reduces efficiency and poses fire risks. Clean it before setup.
- Check local codes: Some areas have rules about venting appliances through existing ducts—always verify compliance.
- Monitor performance: If your AC feels weak or overheats, the vent path may be obstructed or too long.
- Consider alternatives: If the dryer vent isn’t practical, look into wall venting or window kits as backup options.
Portable air conditioners are a lifesaver during hot summers—especially when you don’t want to deal with heavy window units or expensive installations. But here’s the catch: most portable ACs need a clear path to expel hot air. That usually means a window, but what if you don’t have one? Or what if you’re renting and can’t modify walls?
That’s where portable AC venting through dryer vent comes in. It’s a clever trick that lets you reuse an existing duct—your dryer’s—to push out heat instead of letting it recirculate back into your room. In this guide, we’ll walk you through everything you need to know: from checking compatibility to sealing leaks and avoiding common mistakes.
Whether you’re cooling a basement, guest room, or office space, using your dryer vent can save time, money, and hassle. Let’s get started!
Key Takeaways
- Understanding portable AC venting through dryer vent: Provides essential knowledge
Quick Answers to Common Questions
Can I use my dryer vent for both the dryer and portable AC at the same time?
No, running both appliances simultaneously creates conflicting airflow and reduces efficiency for both. Install a manual switch or damper if you need shared access.
Will venting through the dryer vent affect my dryer’s performance?
Yes, if the vent is partially blocked or shared improperly. Always ensure the portable AC isn’t drawing too much air while the dryer runs.
Do I need special tools to connect the hose?
Most adapters require just a screwdriver or clamp tool. Avoid using household glue—HVAC-grade sealants work best.
Can I vent through a plastic dryer vent?
Yes, but ensure it’s rigid enough to support airflow. Flexible plastic vents may collapse under pressure or heat.
What happens if the hose gets too long?
Excess length causes heat buildup and reduced cooling power. Keep the hose under 25 feet and minimize bends.
📑 Table of Contents
Why Vent Through a Dryer Vent?
Dryer vents aren’t just for clothes dryers—they’re also perfect candidates for repurposing. Most homes already have one installed near the laundry area or exterior wall. Instead of leaving it unused, why not put it to work for your portable AC?
The main advantage is convenience. No need to install a new hole or buy expensive window kits. Plus, dryer vents are typically made of rigid metal or durable plastic, which helps maintain consistent airflow. When properly adapted, they provide a stable exhaust route that keeps your portable AC running efficiently.
Another benefit? Reduced noise. Since the hot air exits through the dryer vent rather than a small window opening, there’s less chance of whistling or vibration noises coming from your unit.
But before you start cutting and connecting hoses, let’s talk about what makes this method tick—and when it might not be your best option.
How Does Portable AC Venting Work?
Every portable AC uses refrigerant to absorb heat from indoor air and release it outside. The key part is the exhaust hose, which connects to the back of the unit and leads to an exit point—usually a window. Without that external outlet, the cooled air gets pushed back into your living space, defeating the whole purpose.
When you route the hose through a dryer vent, you’re essentially extending the outdoor path. The process looks like this:
1. Attach the portable AC’s exhaust hose to the dryer vent opening using a compatible adapter.
2. Seal all joints tightly so no warm air sneaks back in.
3. Run the hose along walls or floors until it reaches the dryer vent.
4. Make sure the outer end points outward and isn’t blocked by furniture or curtains.
Think of it as giving your portable AC a highway to escape on—instead of funneling heat back into your cozy room.
What You’ll Need
Before diving in, gather these essentials:
– Universal dryer-to-portable AC vent adapter (check diameter: most are 4” or 5”)
– Duct tape or HVAC-grade mastic sealant
– Foam weather stripping or silicone caulk
– Screwdriver or drill (if mounting brackets are needed)
– Vacuum or brush (to clean the dryer vent)
Having the right tools on hand prevents frustration mid-project. And speaking of preparation—let’s cover safety and compatibility next.
Is It Safe to Use Your Dryer Vent for a Portable AC?
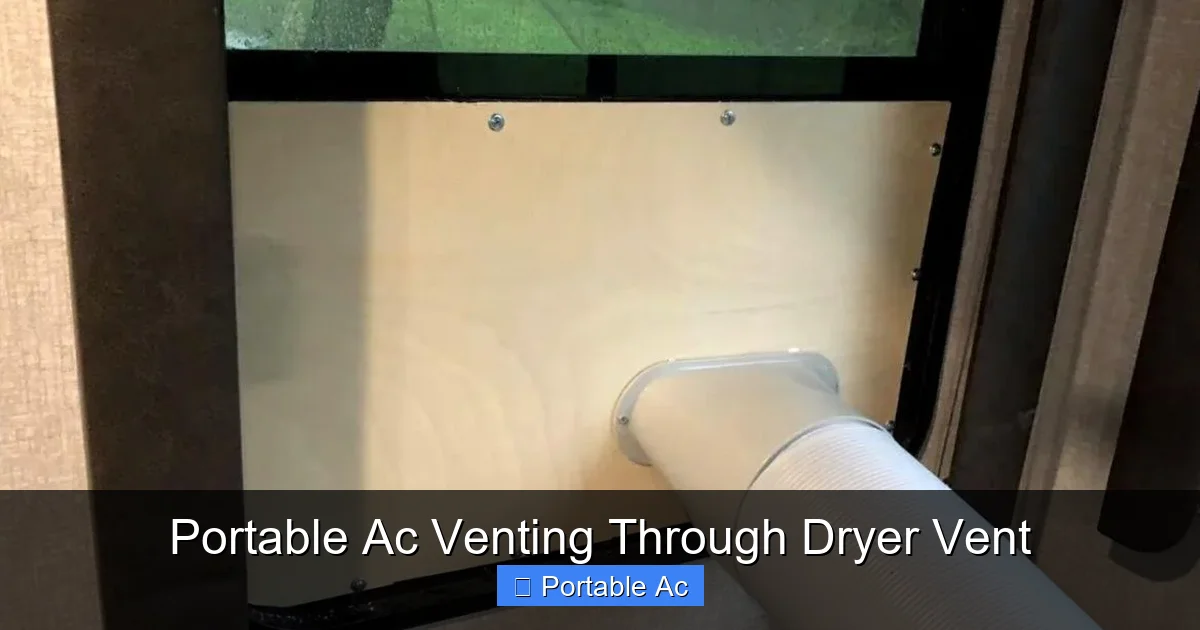
Visual guide about Portable Ac Venting Through Dryer Vent
Image source: camperlife.co
This is the million-dollar question. After all, you’re sharing infrastructure with another appliance. Is that safe? Will it damage your dryer? Could it cause carbon monoxide buildup?
The short answer: Yes, it’s generally safe—as long as you follow basic guidelines.
First, never run both your dryer and portable AC at the same time through the same vent. That creates conflicting airflow and could strain your system. If you must use them together, install a damper or switch between uses.
Second, inspect the dryer vent regularly. Lint buildup increases fire risk and reduces efficiency. Clean it thoroughly before connecting your portable AC.
Third, avoid using flexible foil tape alone—it can degrade over time and create air leaks. Use high-quality duct sealant or metal-backed tapes instead.
Finally, check your local building codes. While many regions allow this practice, some have restrictions on multi-appliance venting. When in doubt, consult a professional.
With those precautions in mind, let’s move on to the step-by-step setup.
Step-by-Step Guide: Installing Portable AC Through Dryer Vent
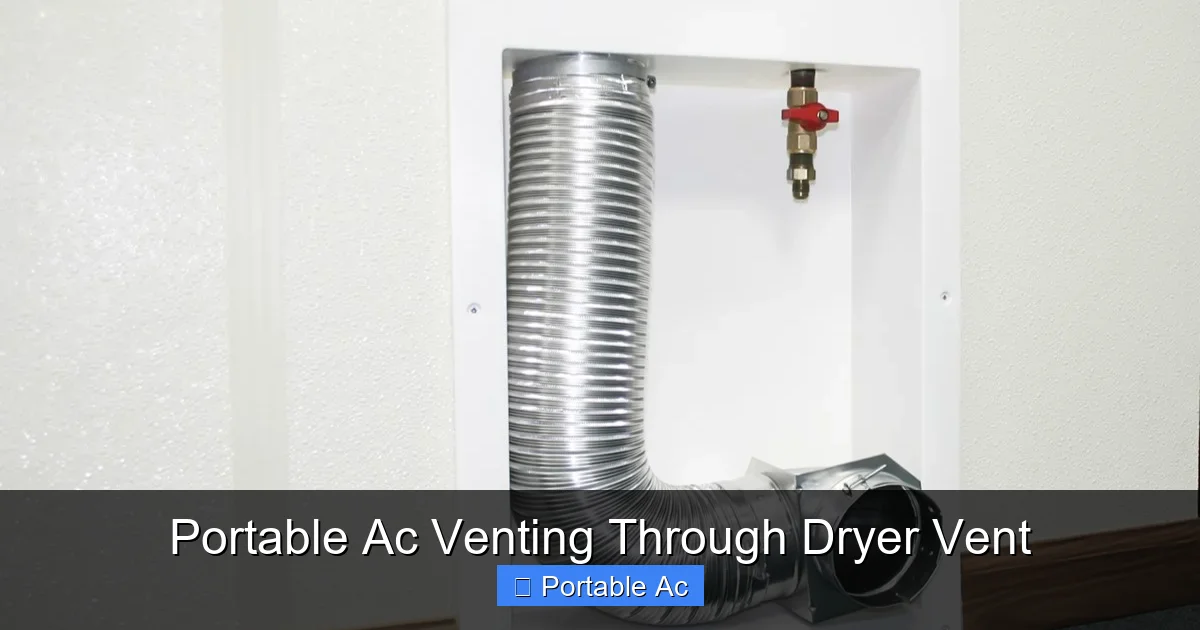
Visual guide about Portable Ac Venting Through Dryer Vent
Image source: storables.com
Ready to do this yourself? Here’s how to install your portable AC using a dryer vent—safely and effectively.
Step 1: Choose the Right Adapter
Your portable AC exhaust hose likely has a standard connector—often 4 inches or 5 inches in diameter. Match this to the inner size of your dryer vent opening. Universal adapters are widely available online or at hardware stores. Look for ones that include clamps or locking mechanisms to keep everything secure.
Pro tip: Measure twice! An ill-fitting adapter creates gaps that let warm air leak back in.
Step 2: Clean the Dryer Vent Thoroughly
A dusty, clogged vent defeats the entire purpose. Use a vacuum attachment or flex brush to remove lint and debris. This also reduces fire hazards and improves overall airflow.
If you haven’t cleaned your dryer vent in over a year, now’s the time. Consider scheduling annual maintenance going forward.
Step 3: Connect the Hose Adapter
Attach the portable AC hose to the dryer vent opening. Wrap threads with Teflon tape if it’s threaded, or apply sealant around edges if it’s flanged. Tighten firmly but don’t overtighten—plastic parts can crack.
For extra security, wrap the connection with HVAC-grade foil tape in overlapping layers.
Step 4: Route the Exhaust Hose
Run the hose from your portable AC to the dryer vent. Keep bends gentle (no sharp turns) to avoid restricting airflow. Use zip ties or tape to secure it along baseboards or walls.
Avoid placing the hose under rugs or behind heavy furniture—heat builds up quickly in enclosed spaces.
Step 5: Seal All Gaps
Even tiny cracks let warm air sneak in. Apply foam tape or silicone caulk around any seams or transitions. Pay special attention to where the hose meets the wall or floor.
This step is crucial for maintaining cooling efficiency and preventing moisture buildup.
Step 6: Test and Monitor
Turn on your portable AC and listen for unusual noises. Feel around connections after 10–15 minutes—if it’s warm or sticky, you’ve got a leak. Adjust seals as needed.
Also monitor your dryer’s performance. If it starts taking longer to dry clothes, you may be competing for airflow.
Following these steps ensures smooth operation and extends the life of both appliances.
Common Mistakes to Avoid
Even experienced DIYers slip up. Watch out for these pitfalls when venting your portable AC through a dryer vent:
- Using flexible plastic hoses only: These sag and kink easily. Rigid or semi-rigid hoses hold their shape better.
- Oversizing the hose: A hose much larger than the dryer vent causes turbulence and poor airflow.
- Running the hose indoors past the vent: Heat accumulates quickly. Keep the entire path outdoors once it leaves your room.
- Ignoring humidity control: Condensation forms in long hoses. Elevate the hose slightly and tilt it toward the outer end to drain moisture.
- Not securing the outer end: A loose hose flap or curtain blocks airflow. Ensure the exit point stays open.
Avoiding these errors saves energy, boosts comfort, and prevents damage.
Alternatives to Dryer Venting
While dryer venting is convenient, it’s not always feasible. Maybe your dryer vent is too far away, or you’re in a rental with strict rules. In those cases, consider these alternatives:
– **Wall venting kits:** Drill a small hole in an interior wall (with landlord approval) and use a sealed sleeve.
– **Window venting adapters:** Designed specifically for sliding or casement windows.
– **Through-the-wall installations:** Permanent but effective—ideal for fixed locations.
– **Evaporative coolers:** For dry climates only; no venting required.
Each option has trade-offs in cost, noise, and aesthetics. Weigh them based on your space and needs.
Maintenance Tips for Long-Term Use
Once your portable AC is vented through the dryer duct, keep it performing well with regular upkeep:
– Clean or replace filters every 2–4 weeks during peak use.
– Inspect hose connections monthly for wear or looseness.
– Vacuum the dryer vent annually—or more often if you notice lint buildup.
– Drain condensation regularly if your model has a built-in tank or external drain.
Simple habits go a long way toward maximizing efficiency and lifespan.
Frequently Asked Questions
Is it legal to vent a portable AC through a dryer vent?
Most residential areas permit this practice, but always check local building codes. Some jurisdictions restrict multi-appliance venting or require permits.
How long should the exhaust hose be?
Keep it under 25 feet and avoid sharp bends. Longer hoses reduce efficiency due to heat retention and resistance.
Can I use duct tape instead of HVAC sealant?
Duct tape alone degrades over time and creates air leaks. Use metal-backed tape or mastic sealant for lasting results.
What if my dryer vent is outside the room?
That’s actually ideal—just route the hose through adjacent walls or floors. Just ensure the final exit point faces outward.
Should I clean my dryer vent before installing the portable AC?
Absolutely. A clean vent improves airflow and reduces fire risk. Remove all lint with a brush or vacuum.
Can I leave the portable AC running overnight?
Yes, as long as the vent remains clear and connections stay sealed. Just monitor temperature and humidity levels.