
Quick Summary: Checking mini-split refrigerant involves looking for ice on the lines, listening for hissing sounds, and observing poor cooling. If you find these signs, call a certified pro, as refrigerant levels need careful handling.
Is your mini-split blowing warm air even when it’s cranked down low? It is frustrating when your cooling stops working right, especially when the weather gets hot. High energy bills can also sneak up on you if your system is struggling. Don’t worry about confusing technical stuff. I am Jack, and I will walk you through checking the signs of low refrigerant so you can feel confident about your AC.
This guide will show you the simple, safe ways to spot a problem. We will learn what refrigerant is without using big words. Then, we will look at the clear signs that tell you it is time to call a technician for a refill or a fix. Let us get your cool air flowing again!
What is Refrigerant and Why Does My Mini-Split Need It?
Think of refrigerant as the special fluid that keeps your AC cool. It moves heat from inside your home to the outside air. It is like the blood in your body—it has to flow smoothly.
Your mini-split system is a closed loop. This means the refrigerant should never run out or need topping off like windshield washer fluid. If it is low, it means there is a leak somewhere in the lines.
When refrigerant gets low, your system works much harder. This makes your electric bill go up fast. It also makes your indoor unit work too hard and might cause it to freeze up.
The Easy Way to Spot Low Refrigerant: 4 Clear Signs
You do not need fancy tools to see the warning signs. Your own eyes and ears can tell you a lot. Look for these four common clues that tell you the refrigerant level is too low.
Sign 1: Warm Air Blowing From the Unit
This is the most obvious sign. If your thermostat says 70 degrees, but the air coming out feels room temperature or slightly cool, you have a problem. The system is running, but it is not removing heat effectively.
Sign 2: Ice or Frost on the Refrigerant Lines
Look at the copper pipes that run between your indoor unit and the outdoor compressor. If you see ice or heavy frost forming on these lines, that is a huge red flag. Ice means the pressure in the lines is too low, causing the temperature to drop below freezing.
Sign 3: Hissing or Bubbling Noises
Listen closely when the system is running. If you hear a hissing, gurgling, or bubbling sound coming from the indoor unit or the lines, this often means the refrigerant is leaking out or boiling too early inside the system.
Sign 4: Slow or Non-Stop Running
A low refrigerant level forces your mini-split to run constantly but never reach the set temperature. It just keeps trying and trying. This is terrible for your equipment and your wallet.
How to Safely Check the Exterior Lines (The Beginner Steps)
We can look at the outside unit, but remember: you should never open the service ports yourself. That is a job for a certified technician. We are just looking for visual clues here.
Follow these steps to safely inspect the visible parts:
- Turn Off Power: For safety, turn off the breaker switch that powers your outdoor unit before getting too close to the coils or pipes.
- Examine the Lines: Look closely at the copper tubing connecting the indoor and outdoor units. Are they covered in thick ice or frost?
- Check the Unit Surface: See if the metal casing around the outdoor unit looks dirty or if there are any oily residue spots near the copper connections. Leaks can sometimes leave a slight oily mark.
- Listen for Sounds: Turn the power back on briefly and listen. Are those strange hissing or bubbling sounds louder near the outdoor unit?
When to Call the Pro: Understanding Refrigerant Pressures
Checking refrigerant levels accurately requires specialized gauges and knowledge of HVAC standards. This is not something you can eyeball or guess at.
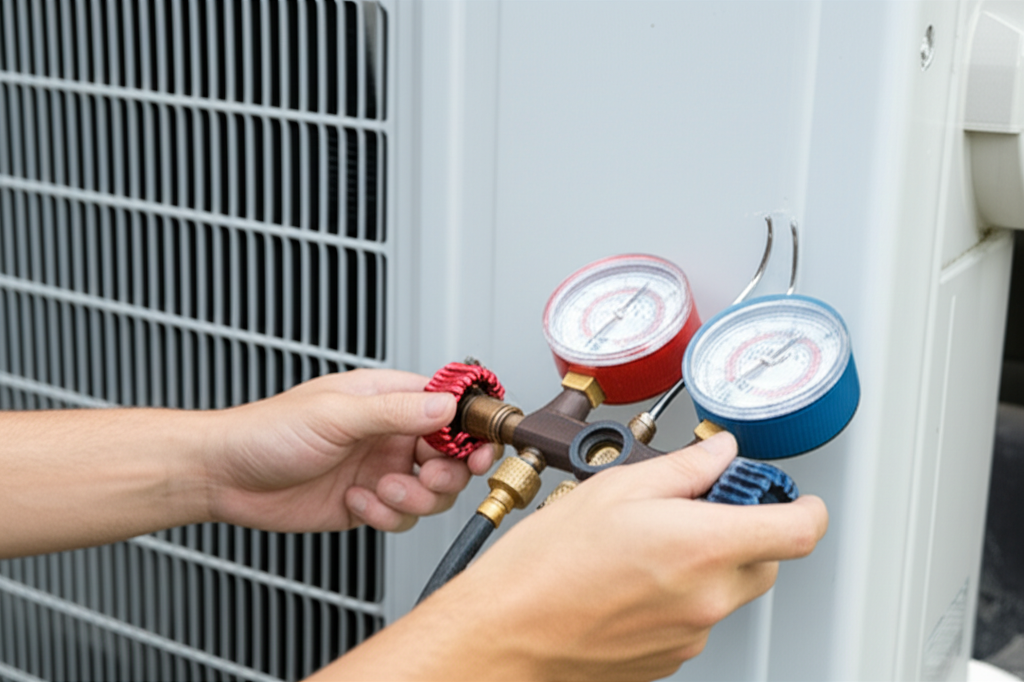
A technician uses a manifold gauge set to measure the high-side and low-side pressures. These pressures must fall within a very specific range based on the outdoor temperature. Only a professional can safely read these gauges.
If you suspect a leak, the technician must do two things:
- Find the Leak: They will use electronic leak detectors or special dye to find exactly where the refrigerant is escaping.
- Repair the Leak: The leak must be fixed permanently before adding any new refrigerant. Adding gas to a leaky system is just wasting money.
For more detailed information on HVAC system care and efficiency, check out these reliable resources:
Energy.gov Guide to Air Conditioners
ASHRAE (American Society of Heating, Refrigerating and Air-Conditioning Engineers)
Mini-Split Troubleshooting: Refrigerant vs. Other Issues
Sometimes, poor cooling is not a refrigerant issue. It might be something simpler you can fix today. Here is a quick chart to help you decide who to call:
| Symptom | Most Likely Cause | Action Needed |
|---|---|---|
| Unit is totally off | Power issue or tripped breaker | Check breaker box |
| Airflow is weak, but cool | Dirty air filter | Clean or replace filter |
| Ice on the lines, warm air | Low refrigerant (Leak) | Call a certified technician |
| Outdoor unit is noisy/rattling | Loose fan blade or debris | Inspect/Clear debris (with power off) |
Mini-Split Maintenance Checklist to Prevent Future Leaks
Keeping your system healthy means checking small things regularly. This routine care can prevent minor issues from turning into big, expensive repairs like major refrigerant leaks.
Here is a simple monthly check-up list:
- Clean Filters Monthly: Always keep the filters inside the indoor unit clean. This keeps air moving freely.
- Clear Debris Outside: Make sure the outdoor unit has at least two feet of clear space around it. No leaves, grass, or bushes touching it.
- Check the Drain Line: Make sure the small hose that drains condensation water is clear. If it clogs, water can back up and cause issues inside.
- Annual Pro Checkup: Have a technician look at the refrigerant lines and connections every year before summer starts. They can tighten things before a leak even starts.
Frequently Asked Questions (FAQ) for New Mini-Split Owners
Can I add refrigerant myself if I see ice?
No, you really shouldn’t. Refrigerant is regulated, and adding it without fixing the leak is illegal and temporary. Plus, using the wrong type or too much can damage your compressor.
How much does it cost to fix a refrigerant leak and refill?
The cost varies a lot. You pay for the technician’s labor to find the leak, the repair itself (patching the pipe), and then the cost of the new refrigerant added. Expect a few hundred dollars at minimum.
How long does refrigerant last in a mini-split?
If there are no leaks, the refrigerant should last the entire lifespan of the unit, which can be 15 to 20 years! If it is low after only a few years, you definitely have a leak that needs fixing.
What temperature should the air coming out of my mini-split be?
When it is cooling properly, the air coming out of the indoor unit should be about 18 to 22 degrees cooler than the air going into it. Measure the difference!
Is it bad if my mini-split runs all the time?
Yes, it is bad. Constant running means it is struggling to meet the set temperature, usually due to low refrigerant, dirty coils, or a bad thermostat setting.
What is the difference between a leak and a recharge?
A recharge is just adding more refrigerant. A leak is the hole where it is escaping. You must always fix the leak first, or the recharge won’t help for long.
Final Thoughts on Keeping Your Cool
Taking care of your mini-split doesn’t have to be scary. By learning to spot simple signs like ice on the lines or warm air, you can catch problems early. Remember, refrigerant issues usually mean a leak, and leaks need professional repair.
Stay consistent with your filter cleaning and outdoor unit checks. These small steps keep your system efficient and save you money on those high summer bills. You are now much more informed about your AC system!
Keep that cool air flowing easily all season long!