
Quick Summary: Testing AC pressure helps you see if your system has enough refrigerant—the fluid that makes the cold air. Low pressure usually means a leak that needs fixing fast to keep your AC running efficiently and save you money.
Is your air conditioner blowing warm air when it should be icy cold? Maybe your energy bills are creeping up, and you just do not know why. It is easy to feel confused when looking at AC gauges and pressure numbers. Do not worry; we are going to break down what AC pressure means. This guide will show you exactly how to check those readings and what simple fixes you can make today.
What Are AC Pressure Readings, Anyway? (The Easy Version)
Think of your AC system like a closed loop of pipes. Inside those pipes is the refrigerant. This is the magic juice that absorbs heat from inside your house and throws it outside.
Refrigerant needs to be at a specific pressure to change from a liquid to a gas and back again. This pressure is how we know if the “juice” level is correct. Too high, and something is blocked. Too low, and you likely have a leak.
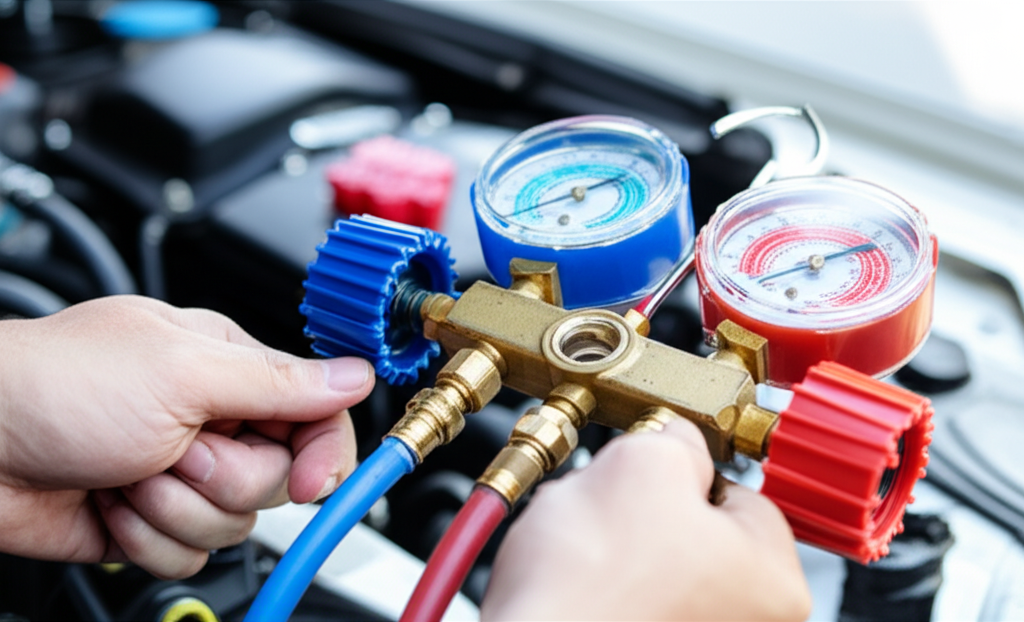
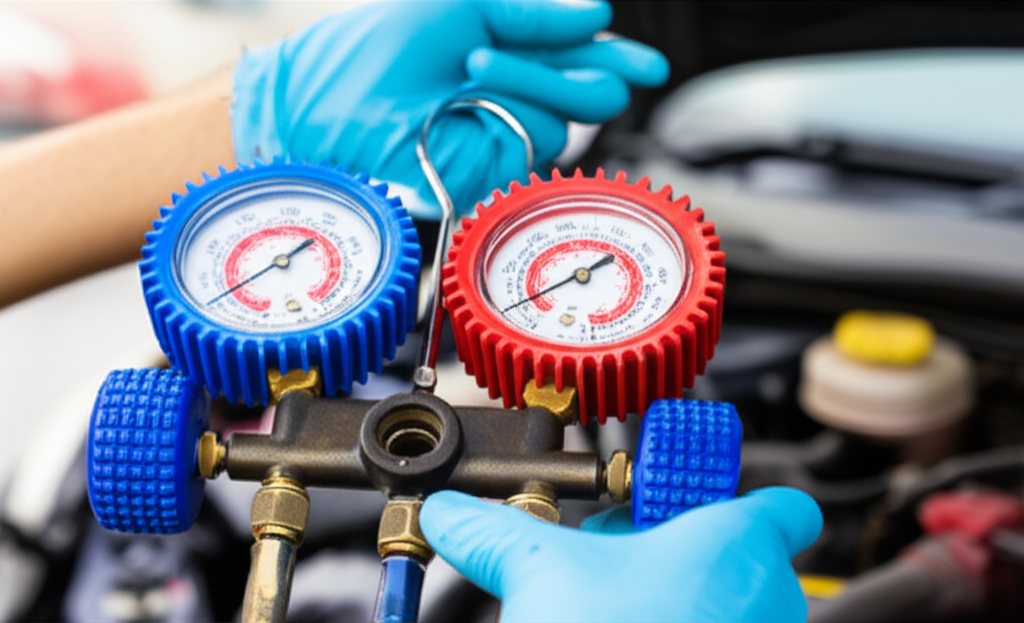
We measure this pressure using special tools called manifold gauges. These tools connect to service ports on your AC lines.
Why You Must Know Your AC Pressure (It Saves Money!)
Checking the pressure is not just for fancy technicians. It is crucial for keeping your system happy. An AC running low on refrigerant works much harder.
When the refrigerant level is low, your AC struggles to cool the air properly. This means the compressor (the AC’s motor) runs longer and longer. Running longer means using more electricity.
Ignoring low pressure can also cause serious damage to the compressor. That is the most expensive part to replace. A simple check can prevent a big repair bill later.
Gathering Your Tools: What You Need to Test Pressure
Before you start poking around, you need the right gear. For testing pressure, you will need a set of manifold gauges. These gauges usually come with hoses in blue, red, and yellow colors.
Here are the basic items you need to get ready:
- Manifold Gauge Set: This connects to your AC system.
- Service Manual or Chart: This tells you the correct pressures for your specific AC model.
- Safety Glasses: Always protect your eyes when working around pressurized systems.
- Rags and Gloves: For a clean and safe setup.
Remember, you are connecting to a system that uses specialized chemicals. If you feel unsure, this is a great time to call a certified pro. But knowing what they are doing is half the battle!
Step-by-Step Guide: How to Connect the Gauges Safely
We check the pressure when the AC unit has been running for at least 15 minutes. This gives the system time to stabilize and reach normal operating conditions.
Follow these simple steps to connect your gauges:
- Locate Service Ports: Find the two metal service ports on the copper lines near your outdoor unit (the condenser). One is larger (the suction line, low pressure) and one is smaller (the liquid line, high pressure).
- Connect the Blue Hose: Attach the blue hose from your manifold gauge set to the low-pressure (suction) service port. This port usually has a larger diameter.
- Connect the Red Hose: Attach the red hose to the high-pressure (liquid) service port. This port is usually smaller.
- Check the Center Hose: The yellow hose stays capped unless you are adding or removing refrigerant—do not connect it to the AC system yet.
- Read the Gauges: Once connected, look at the dials. The blue gauge shows the low-side pressure, and the red gauge shows the high-side pressure.
The gauges will show readings in PSI (Pounds per Square Inch). You must compare these numbers to the chart on your outdoor unit’s sticker or in the owner’s manual.
Understanding the Readings: Low vs. High Pressure
The correct numbers change based on the outside temperature. But here is a very simple way to look at what the gauges tell you:
| Symptom/Reading | Likely Cause | What It Means |
|---|---|---|
| Low Suction Pressure (Blue) & Low Head Pressure (Red) | Low Refrigerant Charge (Leak) | The system is starving for coolant. This is the most common issue. |
| High Suction Pressure (Blue) & High Head Pressure (Red) | Overcharged or Air/Moisture in System | Too much refrigerant or a blockage is causing a backup. |
| Low Suction Pressure (Blue) & High Head Pressure (Red) | Compressor Issues or Clogged Filter/Dryer | The system is struggling to move the refrigerant efficiently. |
For example, on a 90°F day, a healthy AC might show a low-side pressure around 65 PSI and a high-side pressure around 250 PSI. Always check your manufacturer’s specifications for the most accurate numbers!
Crucial Fixes Based on Pressure Readings
Once you have your readings, you can decide what to do next. Remember, adding refrigerant (called “charging”) is often best left to pros because it requires special equipment to do it correctly.
Fix 1: If Pressure is Too Low (The Leak Scenario)
This almost always means there is a leak somewhere in the copper lines or coils. Refrigerant does not get used up; it escapes.
- Action Step: If the pressure is significantly low, you need a professional HVAC technician. They have leak detection tools and EPA certification to legally add refrigerant.
- What You Can Check: While waiting for the tech, check your condenser coils outside. If they are totally covered in dirt and grass clippings, clean them! Dirty coils can make the high-side pressure read artificially high.
Fix 2: If Pressure is Too High (The Overcharge or Blockage)
High pressure means the refrigerant cannot expand properly or there is too much of it.
- Action Step: A technician must safely recover (remove) the excess refrigerant. Too much coolant is just as bad as too little.
- Quick Check: Make sure your indoor air filter is brand new. A clogged filter restricts airflow, which can also make the pressures look wrong.
Fix 3: The Compressor Isn’t Pushing Well
If one side is extremely high and the other is very low, the compressor itself might be failing to pump the refrigerant correctly.
- Action Step: This is usually a sign of major mechanical failure. Call your AC repair specialist immediately for a full diagnostic check.
For more reliable energy usage tips, check out this helpful guide from Energy.gov on keeping your home cool efficiently: Energy.gov Cooling Tips.
Frequently Asked Questions (Just Keep It Simple!)
Here are some common questions I hear all the time from folks just starting out:
- Can I add refrigerant myself?
- It is technically possible, but usually not recommended. You need the exact amount, and adding too much is damaging. It is safer to let a certified person handle the refill.
- How often should I check my pressure?
- You don’t need to check it often! Check it once a year during your spring AC tune-up, or if you notice your cooling performance suddenly dropping.
- What is the difference between high and low side?
- The low side (blue) is the cool, low-pressure side where the refrigerant is absorbing heat inside your home. The high side (red) is the hot, high-pressure side where the refrigerant dumps that heat outside.
- My gauges show the right numbers, but the air is still weak. Now what?
- If the pressures are perfect, the problem might be airflow. Check your thermostat settings, make sure all vents are open, and definitely replace that air filter!
- Is it safe to leave the gauges connected?
- No! Only keep them connected for a few minutes while you take a reading. Leaving them connected can allow moisture or air into the system, which causes big problems.
Understanding AC pressure might sound like rocket science, but it really comes down to one thing: Is the magic juice flowing correctly?
By knowing how to connect your gauges and read the basic signs, you are already ahead of the game. Keep up with simple checks, stay consistent with filter changes, and you will save energy and keep your cool all summer long. Stay comfortable, and I’ll see you next time!