
If your AC isn’t turning on or heating/cooling right, checking the thermostat wires is often the fix. It’s usually just a loose connection or a simple mix-up. We will show you exactly how to check the wiring safely, step-by-step, for a quick repair!
Is your air conditioner acting up again? Maybe it won’t turn on, or it’s blowing warm air when you set it to cold. These problems can make your home uncomfortable fast. Sometimes, the big problem is just a tiny wire connection behind your thermostat.
Don’t worry about complicated electrical diagrams. I’m Jack from ACReviewHub.com, and I’m here to guide you through this. We will look at the thermostat wiring simply and safely. By the end of this guide, you will know exactly how to check those wires and maybe even fix your cooling issue today.
Why Thermostat Wiring Matters So Much
Think of your thermostat as the brain of your AC system. It sends simple electrical signals to the big outdoor unit and the furnace indoors. These signals tell the system when to start cooling or stop running.
If a wire comes loose, or if it’s connected to the wrong spot, the brain can’t talk to the body. This means no cooling, or maybe the system runs all the time when it shouldn’t.
The good news is that the wiring inside a standard thermostat is low voltage. This means it is much safer to check than the thick wires going into your main AC unit. Still, safety first is always my rule.
Before You Touch Anything: Safety Steps First
We must cut the power before we open up the thermostat. This is the most important step for safety.
Here is how you safely shut down power to your whole system:
- Find the Breaker Box: Go to your home’s main electrical panel. This is usually in the garage, basement, or a utility closet.
- Locate the AC Breaker: Look for a switch labeled “AC,” “Furnace,” or “HVAC.” It might be a double-width switch.
- Flip It Off: Firmly push the switch to the “Off” position. This completely cuts the power to both the indoor furnace and the outdoor condenser unit.
- Test the Thermostat: Try turning your thermostat from Cool to Heat, or change the temperature dramatically. If the system does nothing, you have successfully cut the power.
Step-by-Step: How to Check AC Thermostat Wiring
Now that everything is safe, we can look at what is happening behind the plastic cover. Most modern thermostats use small screws or clips to hold the wires in place.
1. Gently Remove the Thermostat Faceplate
Most thermostat faces simply pull straight off the wall plate. Sometimes there is a small tab underneath you need to press. Be gentle; you don’t want to break the plastic clips.
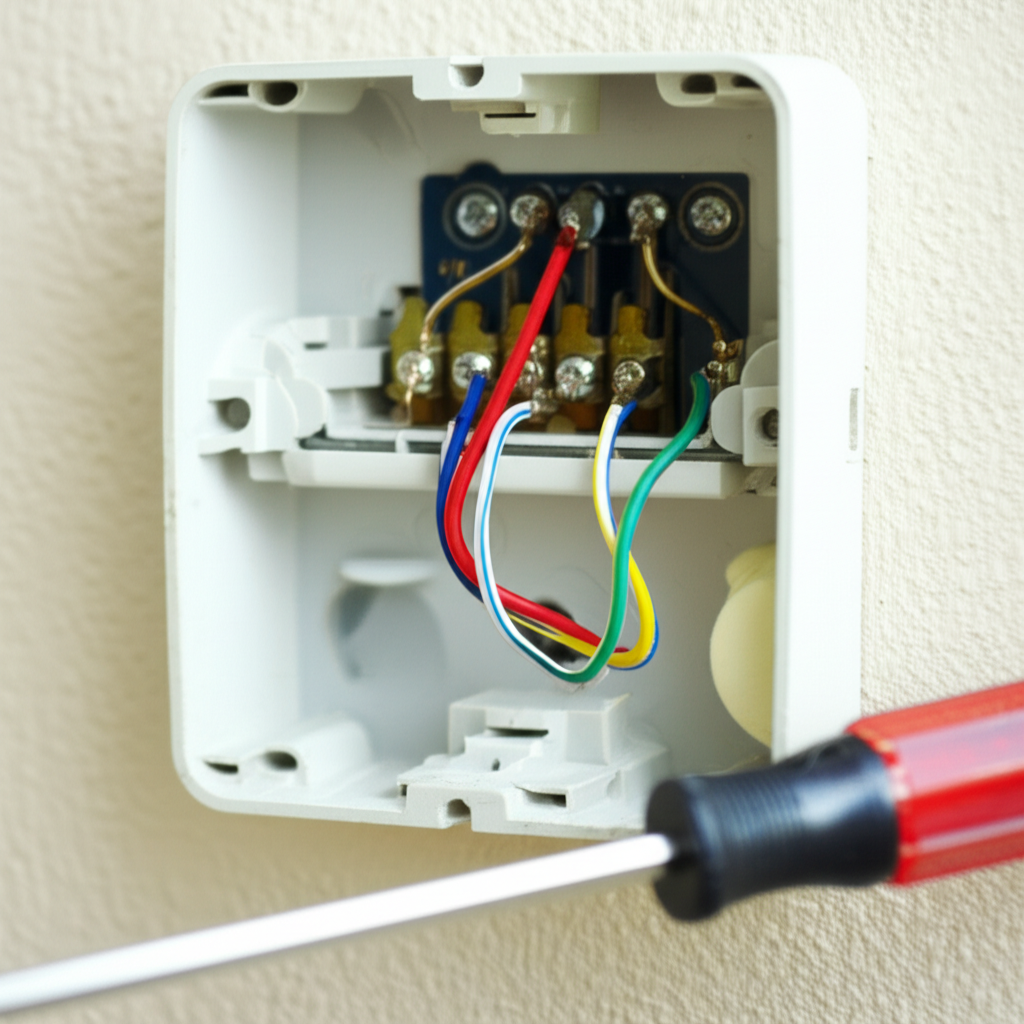
2. Inspect the Wire Terminals
Once the face is off, you will see a small board with letters and tiny screws. These letters are the terminal points where the wires connect. Each letter stands for a specific part of your AC system.
Look closely at the wires entering these terminals. Are any of them loose or sticking out too far? Are any wires touching each other that shouldn’t be?
3. Understand the Common Wire Colors and Letters
While colors can sometimes vary between installations, the letters are standard. Knowing what each letter means helps you spot a mistake.
| Terminal Letter | Wire Function (What it does) | Typical Wire Color (Usually) |
|---|---|---|
| R or Rc/Rh | Power (Hot wire from the transformer) | Red |
| W | Heat (Tells the furnace to turn on) | White |
| Y | Cooling (Tells the compressor to turn on) | Yellow |
| G | Fan (Tells the indoor blower to run) | Green |
| C | Common (Provides continuous power for digital displays) | Blue (Often optional) |
4. Fixing Loose or Misplaced Wires
This is where the “shocking fix” happens—it’s often very simple!
If a wire is loose, use a very small screwdriver (often a jeweler’s size) to gently tighten the screw holding that wire in place. Don’t overtighten it until the screw head strips.
If you see a wire in the wrong spot (for example, the yellow wire is in the ‘W’ terminal), you need to move it. Always refer to the diagram provided with your specific thermostat model if you have one. If you don’t have a diagram, remember: Y is for cooling, W is for heating.
Pro Tip: Before you remove any wire, take a clear photo of the current setup with your phone. This is your best backup plan if things get confusing!
When to Call an HVAC Professional
Checking the wires often solves simple issues. However, sometimes the problem is deeper. You should call an expert if:
- You see frayed, burnt, or melted wires near the thermostat base.
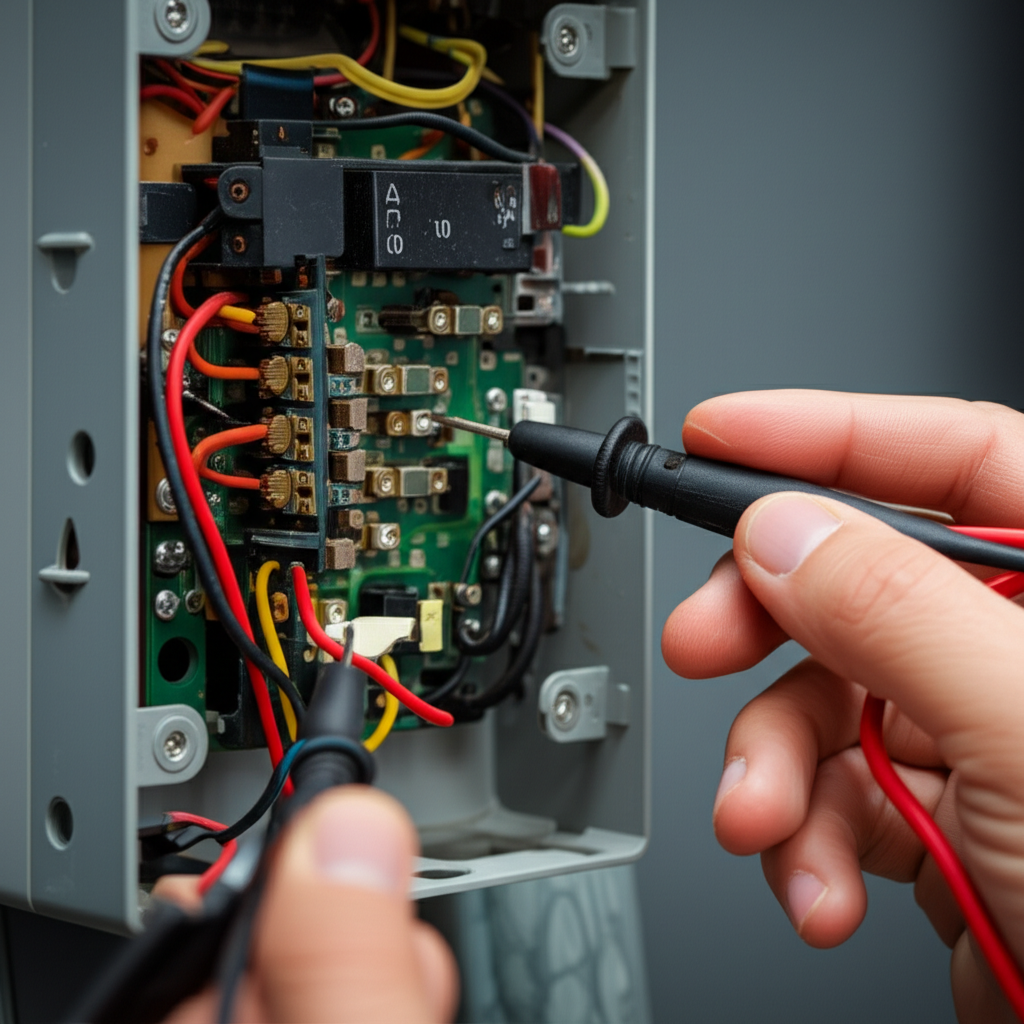
- You correctly wired everything, but the system still won’t respond.
- You suspect a problem with the low-voltage transformer inside the furnace.
- Your thermostat uses specialized wiring (like for heat pumps) and you are unsure of the configuration.
For more in-depth electrical safety and system checks, the Department of Energy offers great resources on home HVAC maintenance here.
Troubleshooting Common Thermostat Symptoms
If you checked the wires and the problem continues, look at what your system is doing now. This table can help narrow down the next steps.
| Symptom | Most Likely Wiring Issue | Next Simple Check |
|---|---|---|
| AC runs constantly, won’t shut off | Y wire is shorting or stuck on | Check the connection at the outdoor unit contactor (requires power off). |
| Fan runs, but no cooling/heating | R or Y wire is loose or broken | Ensure the R wire is tight and clean. |
| Thermostat screen is blank | No power (R wire issue) or missing C wire connection | Check the main circuit breaker again. |
| Heat and Cool are both activating | W and Y wires accidentally touching or swapped | Separate the W and Y terminals completely. |
Reconnecting and Testing Your Work
Once you are confident the wires are secure and correctly placed, it’s time to bring the power back on.
- Reattach the Faceplate: Carefully snap the thermostat faceplate back onto the wall mounting plate.
- Restore Power: Go back to your breaker box and flip the HVAC switch back to the “On” position.
- Test the System: Set the thermostat to cool, setting the temperature five degrees lower than the room temperature. Wait a few minutes. You should hear the outside unit kick on shortly.
If the system starts working, that loose connection was the culprit! Give yourself a pat on the back. You just saved a service call fee.
Frequently Asked Questions Beginners Ask
Here are quick answers to the things folks always ask me about thermostat wiring:
- Do I need a C wire for my new thermostat?
Often, yes. The C (Common) wire gives constant, low power to keep digital screens lit and Wi-Fi connected. If you don’t have one, you might need an adapter.
- What happens if I mix up the Red (R) and Yellow (Y) wires?
If you switch them, your system might try to cool immediately when you turn on the heat, or vice versa. It usually won’t cause permanent damage if you catch it quickly.
- Can I use standard electrical tape on the wires?
No. Only use electrical tape if you are completely capping off a wire end that is no longer in use. Do not use it to join two wires; use the screw terminals.
- My old thermostat had four wires, but my new one has seven slots. What do I do?
This is common! Just connect the four wires you have to their corresponding letters (R, Y, G, W). Leave the empty slots alone unless your new thermostat manual specifically tells you otherwise.
- How often should I check my thermostat wiring?
You don’t need to check it often. Only check it if your AC stops working suddenly or if you install a new thermostat.
Taking control of small HVAC maintenance tasks like checking thermostat wiring makes a huge difference. It saves you money and keeps you cool when you need it most.
Remember, AC troubleshooting doesn’t have to be scary. Most issues have simple answers if you follow a calm, step-by-step process. Stay cool, and happy troubleshooting!