
Quick Summary: Charging a mini-split usually means adding a small amount of refrigerant (like R-410A) using a gauge set connected to the service port, but if it’s completely empty, you need a professional to find and fix the leak first. Always check your unit’s manual for the exact required charge weight.
Is your mini-split not cooling like it used to? That warm air blowing out can be frustrating. High energy bills are no fun either. Many people think AC problems mean a huge repair bill. Don’t worry; we can clear up the confusion today. I’m Jack from ACReviewHub.com, and I will walk you through what refrigerant is and how to safely check or add a little boost if needed. By the end of this guide, you’ll feel confident about your mini-split’s cooling power.
What Is Refrigerant and Why Does My Mini-Split Need It?
Think of refrigerant as the special fluid that does all the heavy lifting inside your AC. It moves heat from inside your house to the outside air. This is how your unit creates cold air. It is not like gasoline in a car; it should never run out.
If your mini-split is low on refrigerant, it means there is a leak somewhere in the lines. Refrigerant is sealed inside the system. If you are adding more, you are just topping it off temporarily until the leak is found. For a full vacuum and recharge, you really need an HVAC pro.
When to Suspect a Low Refrigerant Level (The Warning Signs)
Spotting a problem early saves you money. Look out for these simple signs that your system might be low on its cooling juice.
- Weak Cooling: The air coming out of the indoor unit feels only slightly cool, or not cold at all.
- Ice on the Lines: You might see frost or ice forming on the copper lines connecting the indoor and outdoor units. This is a big red flag.
- Hissing or Bubbling Sounds: Sometimes, you can hear strange noises if the refrigerant is moving through a low-pressure area or a leak.
- High Energy Bills: Your unit runs constantly but never hits the temperature you set on the thermostat.
Gathering Your Tools: What You Need for a Check
For a simple check or a slight top-off (only if you are comfortable), you need the right gear. Remember, this is not a full repair guide, just a check and small addition.
Safety comes first! Always turn off the power to the outdoor unit at the breaker box before touching any service ports.
Here are the basic tools we will use:
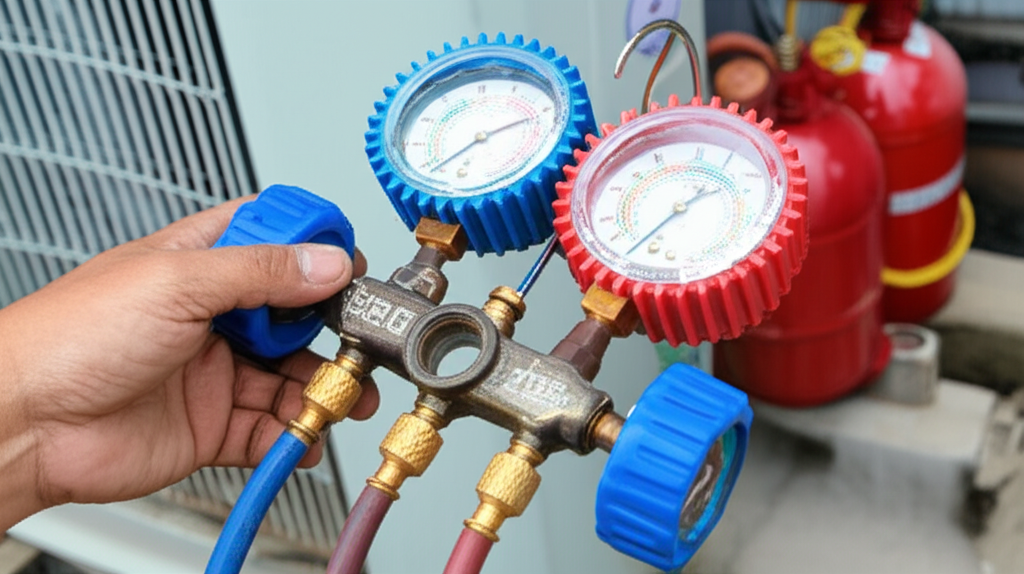
- Refrigerant Canister: Make sure it matches what your unit uses (most modern mini-splits use R-410A). Check the label on your outdoor unit!
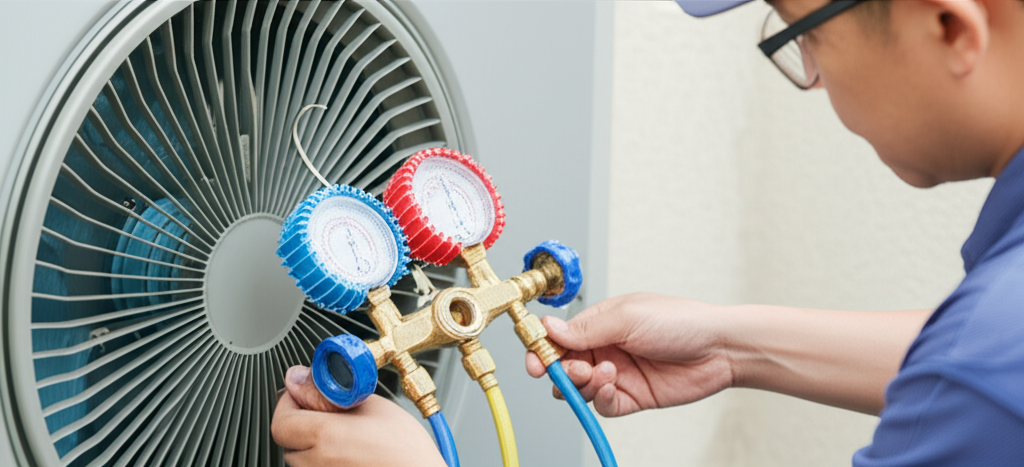
- Gauge Manifold Set: This set connects to the service ports and shows you the pressure inside the lines.
- Hoses: The hoses that connect the gauge set to the can and the AC unit.
- Safety Gear: Gloves and safety glasses are a must. Refrigerant can cause frostbite if it touches your skin or eyes.
Step-by-Step: How to Safely Connect and Check Pressure
Before you add anything, you must know the current pressure. This tells you if you truly need more refrigerant or if the problem is something else, like a dirty coil.
Step 1: Locate the Service Port
The service port is on the outdoor unit (the condenser). It looks like a small capped valve, usually on the larger of the two copper pipes. Carefully unscrew the protective cap.
Step 2: Connect the Manifold Gauge
Connect the low-side (usually the blue hose) from your gauge set to this service port. Do not connect the high-side hose unless you are a certified technician; that side operates under very high pressure.
Step 3: Turn the Power Back On (Briefly)
Turn the power back on to the unit. Let the AC run for about 15 minutes so the system stabilizes. You want to check the pressure while the compressor is running.
Step 4: Read the Pressure
Look at the gauge. The reading needs to be compared to the manufacturer’s required operating pressure. This chart gives a general idea, but your manual is the final word.
| Condition | Typical R-410A Low-Side Pressure (PSI) While Running |
|---|---|
| System Needs Charge | Below 70 PSI (Varies heavily with outside temp) |
| Proper Charge Range | Usually between 85–110 PSI (Check Manual!) |
| Overcharged/Too High | Above 120 PSI |
The Expert Fix: Adding Refrigerant (The Gentle Top-Up)
If the pressure is low, you can carefully add a small can of refrigerant. This is called “topping off.” Remember, this is only a temporary fix if you have a slow leak.
Important Safety Note: Always charge when the unit is running. You add refrigerant through the low-pressure side. If you are using a simple small can meant for DIY use, follow its specific instructions carefully.
- Attach the Can: Screw the refrigerant can onto the open end of the blue low-side hose.
- Open the Valve: Slowly open the valve on the can (or use the piercing mechanism, depending on your can type). You should hear the refrigerant flowing.
- Watch the Gauge: Watch the pressure gauge. You want the pressure to slowly creep up toward the correct operating range shown in your manual.
- Stop Immediately: As soon as the pressure hits the sweet spot, close the can valve and disconnect the hose quickly. Do not overcharge the system!
If you see the pressure rise too fast or if the unit starts icing up while adding, stop immediately. Overcharging can damage your compressor.
Why You Might Still Need a Pro Technician
While topping off is easy, finding the leak is not. A licensed technician has special tools to locate and repair the leak, ensuring your system stays full long-term. They also must legally recover (remove) old refrigerant before opening the lines.
Check out the good advice from Energy.gov on keeping your cooling systems running efficiently: Energy Saver Maintenance Tips.
Avoiding Common Mini-Split Refrigerant Mistakes
Even with good intentions, beginners can make simple mistakes. Avoid these common pitfalls to keep your system healthy.
| Mistake to Avoid | Why It’s a Problem |
|---|---|
| Charging the High-Pressure Side | Can cause instant, severe damage to the compressor. Stick to the blue, low-pressure line. |
| Charging When the Unit is Off | Refrigerant won’t flow correctly, and you won’t get an accurate pressure reading. |
| Using the Wrong Refrigerant Type | Mixing R-22 and R-410A ruins the system. Always double-check the label on your unit. |
| Ignoring the Ice Buildup | Ice means the system is already critically low or has airflow issues—adding gas won’t fix the root cause. |
Mini-Split Maintenance Checklist for Better Cooling
Keeping your system running well means less chance of refrigerant issues. Here is a quick list for happy cooling:
- Clean or replace the indoor filters monthly during heavy use seasons.
- Keep the outdoor unit clear of leaves, grass clippings, and debris.
- Ensure the outdoor unit has plenty of space around it for airflow.
- Inspect the copper lines running between units for any obvious damage or kinks.
- Schedule an annual check-up with an HVAC professional for pressure checks.
Frequently Asked Questions (FAQs)
Q: How much does it cost to recharge a mini-split?
A: If it’s just a small top-up, the cost is just the price of the can (maybe $30-$50). If a tech has to find and fix a big leak, it can cost several hundred dollars.
Q: How often should I add refrigerant?
A: Never! If your system is properly installed and leak-free, you should never have to add refrigerant. If you are adding it yearly, you have a leak that needs professional repair.
Q: Can I use an automotive AC recharge kit?
A: Absolutely not. Mini-splits use different refrigerants and pressures than cars. Using the wrong kit can destroy your mini-split compressor.
Q: What is the difference between R-22 and R-410A?
A: R-22 is an older gas being phased out. R-410A is the standard, more energy-efficient refrigerant used in almost all new mini-splits today.
Q: My unit is blowing hot air in winter. Is this a refrigerant issue?
A: Not usually. If you have a heat pump mini-split, it might be switching modes, or the outdoor coil might be in a defrost cycle. Check your manual first.
Q: How do I know if I overcharged the system?
A: The outdoor unit will run very loudly, the pressures will be too high, and you might notice the cooling performance actually gets worse, not better.
Wrapping Up Your AC Confidence
See? Dealing with your mini-split doesn’t have to be scary. You now know the basics of what refrigerant does and how to safely check the pressure. For small dips, a gentle top-up might get you through the week. But remember, finding and fixing the actual leak is the real expert fix.
Keep up with simple filter cleaning, and don’t hesitate to call a pro when you see persistent issues. Stay cool, and happy cooling!