
Quick Summary: Inspecting your AC valve is easy! Look for visible leaks, check for ice, and listen for hissing sounds. If you see oil or ice, call a pro. This simple check keeps your system running smoothly and saves you money.
Is your air conditioner blowing warm air? Maybe your energy bill is much higher than last month. It is easy to feel confused when your AC acts strange. Many common issues start with small parts, like the service valves.
Don’t worry, you do not need to be a technician to look at these parts. I am Jack from ACReviewHub.com, and I will show you exactly what to look for. We will keep things simple, step-by-step. Get ready to understand your AC better than ever before!
What Exactly Is an AC Service Valve?
Think of your AC as having small doors on the outside unit. These doors are called service valves. Technicians use them to check the refrigerant pressure. Refrigerant is the special fluid that makes your air cold.
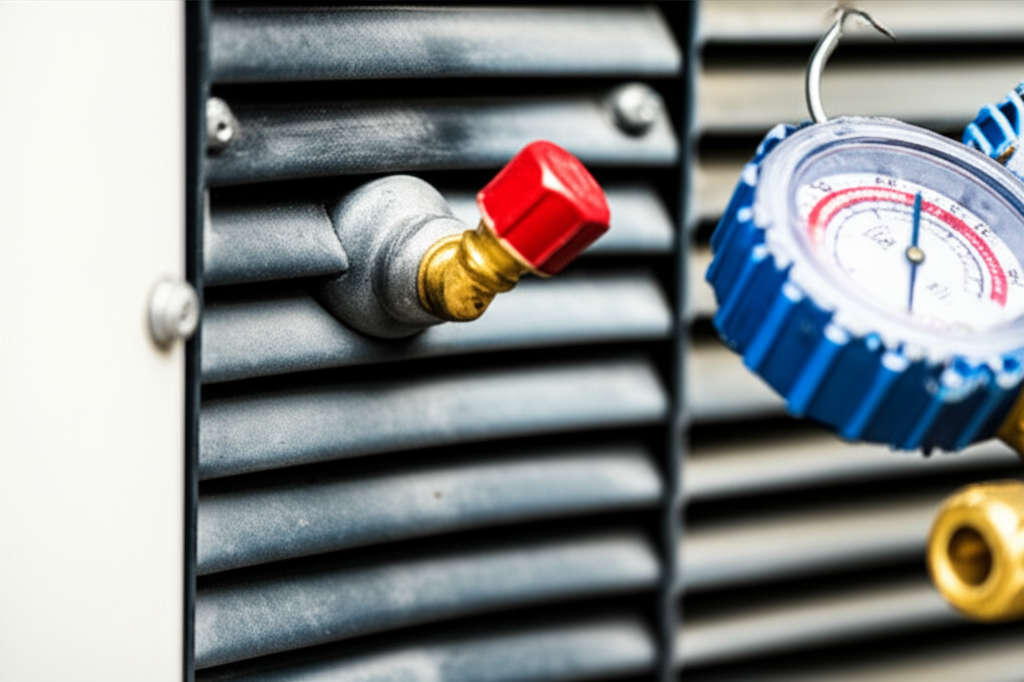
These valves have caps on them, just like on a car tire. They are usually found on the copper lines coming out of your outdoor unit (the condenser). There are usually two valves: a larger one and a smaller one.
These valves must stay sealed tightly when you are not using them. If they leak, your AC loses its cold power. This is a big reason why ACs stop cooling well.
Safety First: Before You Touch Anything
Your AC unit uses high pressure and electricity. We must be safe before we inspect anything. This guide is for visual checks only. We are not adjusting anything yet!
Here are the absolute must-do safety steps:
- Turn off the power to your outside unit at the thermostat. Set it to “Off.”
- Turn off the main power switch for the outdoor unit. This switch is often a box right next to the unit on the wall.
- Wait about five minutes. This lets any stored power drain away safely.
- Always wear safety glasses. This protects your eyes from dirt or small debris.
Locating and Identifying Your AC Service Valves
Let’s find those valves on your outdoor unit. This is the big box that sits outside your house.
Look for the copper pipes connecting the house to the unit. You will see two main lines, one bigger and one smaller. These lines lead to the valves.
The smaller valve is usually the “liquid line.” The larger valve is the “suction line.” Both should have a protective cap covering the stem. Make sure these caps are screwed on tight!
If a cap is missing, that is your first clue. A missing cap lets dust and moisture get into the system. This can cause big problems later on.
Step-by-Step Guide: How to Inspect the Valves
Now that we have found the valves and turned off the power, let’s look closely. This is simple detective work.
Step 1: Visual Check for Oil or Moisture
Look very closely at the area around the valve stem. Do you see any oily residue? Refrigerant oil often leaks out with the refrigerant gas.
Sometimes, you might see water or ice buildup, even if the unit is off. Oil spots are a clear sign of a slow leak that needs a technician’s help.
Step 2: Check the Valve Caps
Feel the caps on both the small and large service valves. Are they present? Are they tight? If they are loose, carefully hand-tighten them. Do not use tools for this step yet.
Step 3: Listen for Sounds (System Running)
This step requires turning the power back on briefly. Set your thermostat to cool and turn the AC on. Listen carefully near the outdoor unit.
Do you hear a hissing or whistling sound coming from one of the valves? A clear hissing sound means refrigerant is escaping. If you hear this, shut the system down immediately.
Step 4: Check for Frost or Ice
If your AC has been running poorly for a while, check the larger (suction) service line while the unit is running.
If this line or the valve itself is covered in ice or frost, it means you have a serious pressure issue, likely low refrigerant. Ice is never good on these lines.
For more detailed pressure checks that pros use, check out this guide on refrigerant levels from Energy.gov for good efficiency tips.
What Do the Inspection Results Mean?
Your inspection will usually result in one of three findings. Knowing what they mean helps you decide what to do next.
| What You Saw | What It Likely Means | Action Required |
|---|---|---|
| Caps missing, no oil/ice, no noise | System is likely fine, but put new caps on. | Replace caps. Monitor cooling. |
| Oily residue near the valve stem | Slow refrigerant leak is occurring. | Call a licensed HVAC technician. |
| Hissing sound while running | Major, active refrigerant leak. | Turn off AC immediately. Call a technician. |
| Ice or heavy frost on the large line | Low refrigerant or an airflow problem. | Turn off the unit. Call a technician. |
When to Call a Professional Technician
Remember, refrigerant handling is complex and regulated. You should never try to add or adjust refrigerant yourself. That is where the pros come in.
Call an HVAC expert right away if you find any of these issues:
- Visible oil stains around the valves.
- A clear hissing or spraying sound when the AC runs.
- Ice forming on the copper lines or valves.
- The unit runs constantly but never cools the house down.
A good technician will use special gauges to check the pressure accurately. They can safely find and repair the leak. This keeps your system safe and running efficiently.
Easy Maintenance Tips to Protect Your Valves
Keeping your valves healthy is part of good AC ownership. It is not hard if you stay consistent.
Here are simple things you can do throughout the year:
- Check valve caps seasonally (spring and fall). Make sure they are secure.
- Keep the area around the outdoor unit clear. Trim back bushes and grass at least two feet away.
- Change your air filter monthly. Dirty filters stress the whole system, including the lines near the valves.
- Wipe down the outside unit gently once a year to remove heavy dust buildup.
Essential AC Efficiency Checklist
| Task | Frequency | Why It Matters |
|---|---|---|
| Clean/Replace Air Filter | Monthly (in use season) | Prevents strain on refrigerant lines. |
| Check Outdoor Unit Clearance | Twice a Year | Ensures proper heat exchange. |
| Inspect Valve Caps | Every 3 Months | Prevents moisture and dirt intrusion. |
| Professional Tune-Up | Annually (Spring) | Technicians check valve pressures safely. |
Frequently Asked Questions for Beginners
Here are some quick answers to things I hear all the time.
Q1: Can I touch the copper lines near the valves?
A: Yes, you can gently touch them when the AC is off. If the AC is running and the small line feels very cold or sweaty, that is normal. If the large line is freezing, turn the unit off.
Q2: How tight should the valve caps be?
A: Hand-tight is enough! You are just sealing out dust. Do not crank them down hard with tools, or you might break the plastic threads.
Q3: What if I lost one of the caps?
A: Get a replacement cap right away. You can buy universal Schrader valve caps at most hardware stores. They are very cheap!
Q4: Does the valve make my AC louder?
A: The valve itself shouldn’t make noise. If you hear loud banging or clicking near the valves, that is usually a fan issue, not the valve leaking.
Q5: How often should a pro check my valves?
A: Most pros check the pressures during a standard annual maintenance visit. That is usually enough protection.
Q6: Is a small bit of dust okay around the valve?
A: A little dust is fine. But if you see oily grime mixed with the dust, that means refrigerant or oil is slowly escaping.
Wrap-Up: You Are Now an AC Valve Expert
See? Inspecting your AC service valves is not scary at all. It is mostly about looking closely for oil, ice, or funny noises.
By taking these small steps to look at your valves a few times a year, you catch small issues before they become big, expensive headaches. Stay consistent with your simple checks, keep the area clear, and your AC will reward you with cool air all summer long.
Keep checking in here at ACReviewHub.com if you ever have more questions. Stay cool!