
Portable AC venting through wall is a smart solution when traditional windows aren’t available or suitable. This method allows you to cool your space effectively by directing hot air outside through a custom wall opening. With the right tools and techniques, you can install a secure, weather-resistant vent that keeps your home cool and energy-efficient. Whether you’re in an apartment, rental, or modern home, wall venting offers flexibility and performance without permanent modifications.
Key Takeaways
- Wall venting bypasses the need for a window: Ideal for rooms without operable windows or in multi-unit buildings where window AC units aren’t allowed.
- Proper installation prevents air leaks: A well-sealed wall duct ensures maximum cooling efficiency and minimizes energy loss.
- Tools like wall vents and flexible ducts are essential: These components create a safe path for exhaust air while maintaining structural integrity.
- Safety and building codes matter: Always check local regulations before cutting into walls—some areas require permits or professional installation.
- Maintenance extends system life: Regular cleaning of filters and ducts helps maintain airflow and unit performance over time.
- Energy efficiency improves with insulation: Insulating the ductwork reduces heat gain and enhances overall cooling effectiveness.
- Professional help may be needed for complex setups: If you’re unsure about electrical or structural considerations, consult an HVAC expert.
Key Takeaways
- Understanding portable AC venting through wall: Provides essential knowledge
Quick Answers to Common Questions
Can I vent my portable AC through a brick wall?
Yes, but you’ll need a masonry drill bit and possibly a flashing kit to prevent water leaks. Ensure the hole is slightly sloped outward to divert rain. Always seal around the edges with waterproof caulk.
Do I need a permit to cut a hole in my exterior wall?
It depends on your city and the type of wall. Some municipalities require permits for structural changes or exterior modifications. Check with your local building department before starting work.
Will wall venting affect my home’s resale value?
Most buyers understand functional upgrades like HVAC improvements. As long as the installation is clean and meets code, it typically adds value rather than detracting from it.
What if my wall has insulation? How do I avoid damaging it?
Use a thermal imaging camera or knock lightly to locate studs and insulation pockets. Cut a small pilot hole first to map the interior layout before making larger cuts.
Can I reuse the same vent for multiple portable ACs?
Technically yes, but running two hoses through one hole creates competition for airflow, reducing each unit’s effectiveness. It’s better to dedicate one vent per AC.
📑 Table of Contents
Why Choose Portable AC Venting Through Wall?
Imagine this: You’ve just bought a powerful portable air conditioner to beat the summer heat. But your bedroom has no window—or worse, it’s a sliding glass door or a wall with no ventilation option. You’re stuck. That’s where portable AC venting through wall comes in. This innovative approach lets you enjoy the full cooling power of a portable unit even when traditional window installation isn’t possible.
Unlike fixed window units, portable ACs are designed to expel hot air through a single hose. Most come with a tailpipe that connects directly to the machine. Normally, you’d route this hose out a window using a window kit. But what if there’s no window? That’s when venting through the wall becomes a game-changer.
By creating a dedicated exhaust hole in your exterior wall, you allow the hot air to escape safely outside. This method not only works but can be more efficient than trying to force a hose through awkward openings. Plus, it gives you freedom in room placement—no more being locked to a window.
The Benefits of Wall Venting Over Other Methods
Many people assume they must choose between no AC or a messy hose draped across the floor. But wall venting solves both problems. It keeps your living space tidy and prevents tripping hazards. More importantly, it maintains consistent airflow, which directly impacts cooling performance.
Another advantage? No more drafts or cold spots. When the exhaust hose runs through a poorly sealed window kit, cold air can leak back in. With a proper wall vent, the connection is tight and insulated, reducing energy waste and improving comfort.
Also, wall venting is especially useful in modern homes built with large windows, French doors, or minimal exterior openings. In apartments or condos, landlords often restrict modifications to windows—but exterior walls may be fair game (with approval). Always check your lease or HOA rules first!
How to Install a Portable AC Vent Through a Wall
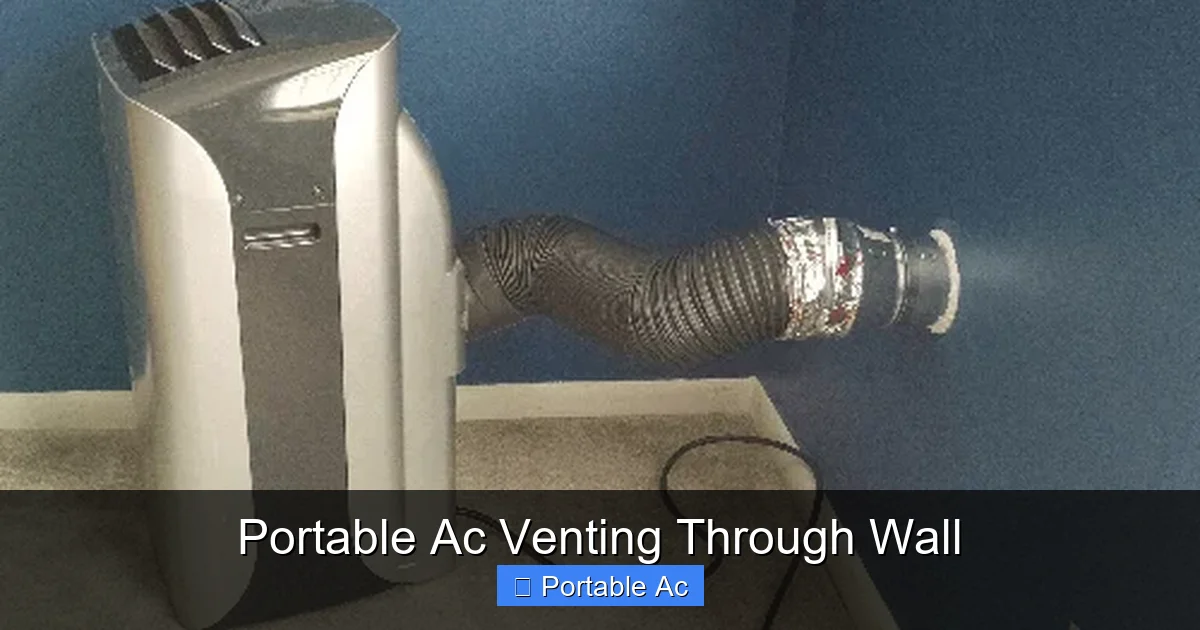
Visual guide about Portable Ac Venting Through Wall
Image source: coolandportable.com
Installing a wall vent isn’t rocket science, but it does require planning, the right tools, and attention to detail. Follow these steps carefully to ensure safety, efficiency, and longevity.
Step 1: Measure Your Portable AC Hose
Start by checking the diameter of your portable AC’s exhaust hose. Most standard models use a 5-inch (127 mm) diameter hose, but some newer units have 4-inch hoses. Measure precisely so you know what size vent opening you’ll need.
Next, decide where on the exterior wall you want the vent. Ideally, choose a spot near ground level, away from landscaping, gutters, or other obstructions. The closer the vent is to the AC unit inside, the less length the hose needs—which means less resistance and better airflow.
Step 2: Mark and Cut the Exterior Hole
Once you’ve picked your location, measure twice and mark the area on the outside wall. Use a stud finder to avoid cutting into electrical wires or plumbing behind the wall. If you’re unsure, consult a professional before proceeding.
Using a hole saw or reciprocating saw with a carbide-tipped blade, cut a clean, round opening matching your hose diameter. Sand any rough edges to prevent damage to the hose later.
Step 3: Prepare the Interior Side
Go inside and locate the corresponding spot on the interior wall. You’ll need to cut an access panel—usually in a closet, hallway, or under a staircase—to reach the wall cavity. This allows you to run the hose neatly and secure it properly.
Use a drywall saw to cut a rectangular opening just big enough to pass the hose through. Be careful not to damage insulation or wiring inside the wall.
Step 4: Install the Duct and Seal Everything
Run the portable AC hose from the machine through the interior access panel, then through the exterior hole. Attach a rigid or semi-rigid duct collar at the exterior end to seal against the wall. Use silicone caulk or foam insulation around the edges to block drafts.
Inside, secure the hose with clamps or metal ties spaced every 18–24 inches. Avoid sharp bends—keep curves gentle (more than 90 degrees can restrict airflow). For best results, use insulated duct tape or foil tape rated for high temperatures.
Step 5: Test and Maintain
Turn on your portable AC and feel for air movement around the seams. If you sense leaks, reapply sealant. Check the filter monthly and clean or replace it as needed. Also, inspect the hose periodically for kinks or wear.
With proper installation, your portable AC will run quietly and cool efficiently—without leaving puddles of water or blowing warm air into your room.
Best Practices for Efficient Wall Venting
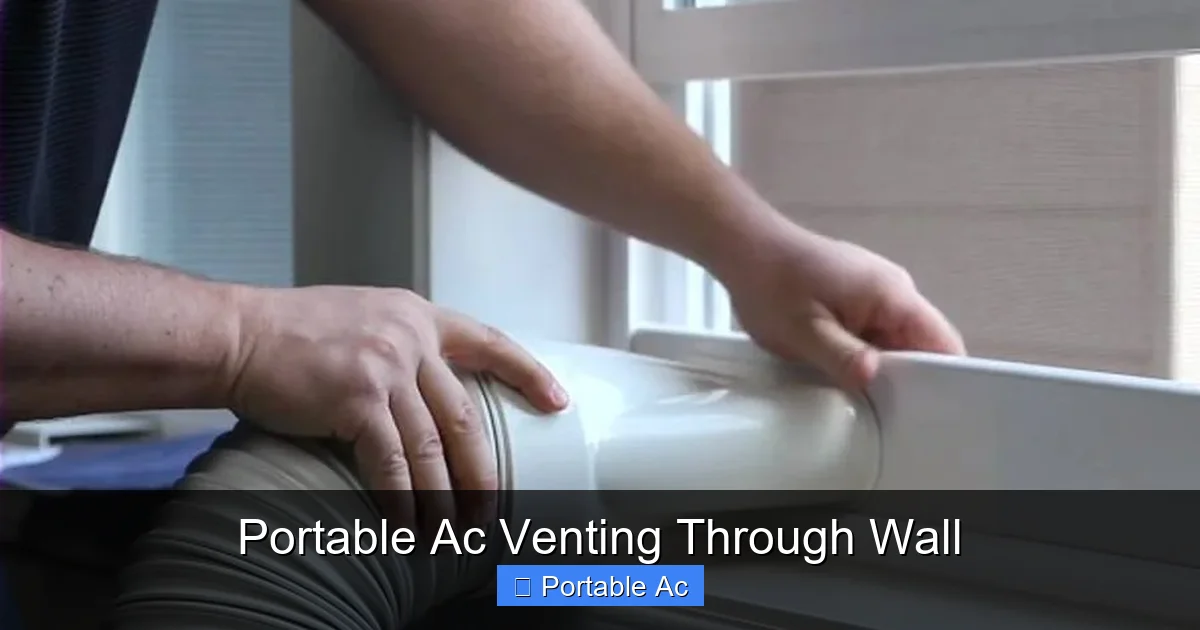
Visual guide about Portable Ac Venting Through Wall
Image source: coolandportable.com
Even the best installation won’t perform well if you skip key maintenance steps. Here are some pro tips to maximize your portable AC’s performance:
– Use insulated ductwork: Wrapping the hose in foam insulation reduces heat transfer and keeps exhaust air cooler, improving condensation and efficiency.
– Keep the hose straight: Long, coiled, or bent hoses increase backpressure, making the compressor work harder and consume more electricity.
– Clean the vent regularly: Dust and debris can accumulate at the exterior vent, blocking airflow. Wipe it down seasonally.
– Choose a quiet location: Place the portable unit away from sleeping areas to reduce noise. Some models include vibration pads or sound-dampening features.
– Monitor humidity levels: In humid climates, consider using a dehumidifier alongside your portable AC to prevent moisture buildup.
If you’re unsure about any step, refer to our detailed guide: How To Vent Portable AC Through Wall Amazing Fix. It includes photos, diagrams, and troubleshooting tips.
Common Mistakes to Avoid
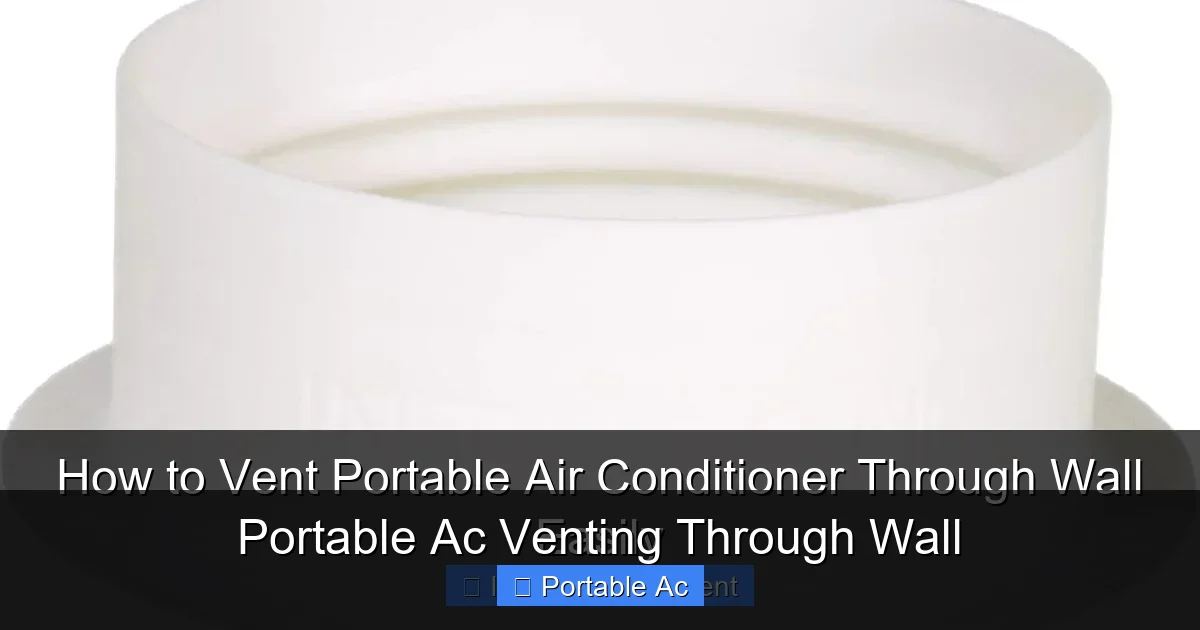
Visual guide about Portable Ac Venting Through Wall
Image source: airconditionsolve.com
While wall venting sounds simple, many DIYers make avoidable errors that reduce efficiency or cause damage. Watch out for these pitfalls:
– Cutting too close to corners or rooflines: This weakens structural integrity and invites water intrusion.
– Using flimsy plastic ducts: Thin-walled hoses collapse easily under suction, blocking exhaust flow.
– Ignoring insulation gaps: Unsealed holes let conditioned air escape, wasting energy and lowering thermostat readings.
– Overlooking local building codes: In some cities, exterior wall modifications require permits or inspections.
If your home has vinyl siding, brick, or stucco, special adapters may be needed. For example, a brick wall requires a masonry drill bit and possibly a flashing kit to direct rainwater away from the hole.
Always prioritize safety. Never cut into load-bearing walls unless you’re certain they aren’t structural. When in doubt, hire a contractor familiar with HVAC installations.
Alternatives to Wall Venting (And When to Use Them)
Not every situation calls for a permanent wall modification. Here are three alternatives worth considering:
1. **Through-Window Kits**: If you have a small window, upgrade to a universal window AC kit with better seals. Look for models with adjustable brackets and reinforced gaskets.
2. **Exhaust Fans with Condensate Management**: Some portable ACs offer dual-hose systems or built-in condensate pumps that eliminate the need for external venting altogether. These are ideal for windowless rooms.
3. **Ceiling-Mounted Exhaust Vents**: In basements or garages, you might install a ceiling vent connected to a flex duct leading outside. This works best in unfinished spaces.
However, if your goal is flexibility, portability, and strong cooling power, sticking with a standard portable AC and adding a wall vent remains the most practical long-term solution.
For those comparing top-rated models, check out our reviews of best portable ACs for rooms with no window, which often feature self-evaporating systems or easy hose routing.
Energy Efficiency and Environmental Impact
One concern many homeowners raise is whether wall venting affects energy bills. The truth? A well-installed system improves efficiency compared to improvised solutions like rolling a hose through a basement window.
When hot air is expelled quickly and completely outside, your AC doesn’t have to fight against reverse airflow. This means faster cooling times and lower runtime—directly translating to savings on your electricity bill.
Moreover, modern portable ACs use inverter technology and eco-friendly refrigerants, reducing their carbon footprint. Pair that with smart thermostats and programmable timers, and you’re looking at a climate control setup that’s both effective and environmentally responsible.
Just remember: even the greenest unit won’t save energy if the ductwork is leaking or the hose is tangled. Proper installation is the foundation of efficiency.
Frequently Asked Questions
Is it safe to vent a portable AC through an interior wall?
No, interior walls don’t lead outside and will trap hot, humid air, causing mold and poor cooling. Only exterior walls should be used for venting—they provide a clear path to the outdoors.
How long should the exhaust hose be for optimal performance?
Shorter is better. Aim for under 10 feet with minimal bends. Every extra foot increases resistance and reduces cooling power by up to 20%.
Can I paint over the exterior vent opening?
Only after the caulk or sealant has fully cured (usually 24–48 hours). Use exterior-grade paint to match your siding color and protect against weathering.
What happens if I forget to close the interior access panel?
Cold air from your AC may leak into unconditioned spaces like attics or crawlspaces, increasing energy use and potentially causing condensation issues elsewhere.
Are there portable ACs that don’t require venting at all?
Yes! Models with self-evaporating systems or dual-hose designs circulate room air internally instead of exhausting heat outside. These are ideal for small, enclosed spaces.
How often should I clean the wall vent?
At least once per cooling season. Use a vacuum or brush to remove dust, spider webs, and debris that could restrict airflow and promote mold growth.