
AC Capacitor: Easy DIY Replacement Guide
Your AC capacitor is a small but mighty part that helps your air conditioner start up and run smoothly. If your AC is struggling to turn on or makes odd noises, a bad capacitor might be the culprit. Don’t worry, replacing it is often a simple DIY job you can tackle yourself to get cool air flowing again!
Hey there! Jack here from ACReviewHub.com. Is your air conditioner acting up? Maybe it’s making a humming noise but not blowing cold air, or perhaps it’s taking a long time to kick on. These little hiccups can be frustrating, especially when the weather heats up. But before you call for expensive service, let’s explore if a common part called the AC capacitor is the issue.
I know AC terms can sound like a foreign language. My goal is to break it all down for you, step-by-step. We’ll make understanding and even fixing your AC feel totally doable. Get ready to learn how to identify a faulty capacitor and, with a little guidance, replace it yourself. Let’s get your cool air back!
What Exactly is an AC Capacitor?
Think of your AC capacitor like the starter motor in your car. It gives the fan motor and compressor a big jolt of energy to get them going. Without a good capacitor, these important parts just won’t spin up properly.
There are usually two types of capacitors in your outdoor AC unit: a start capacitor and a run capacitor. Sometimes, they are combined into one unit called a dual-run capacitor. This dual-run type is super common in home air conditioners.
Signs Your AC Capacitor Might Be Failing
Spotting a bad capacitor is often the first step to a quick fix. Keep an eye out for these common symptoms:
- Your AC unit hums but the fan doesn’t spin.
- The AC starts and stops frequently.
- Your air conditioner is blowing warm air.
- The outdoor fan motor is slow or not running at all.
- You hear a buzzing or clicking sound when the AC tries to start.
Why Do AC Capacitors Fail?
Capacitors are electrical components, and like any part, they can wear out over time. Heat is a big factor. Your AC unit is outside, exposed to the elements, and the constant heat generated during operation can shorten a capacitor’s lifespan.
Age is another reason. A capacitor might last many years, but eventually, its internal components degrade. Power surges from storms can also give a capacitor a fatal shock.
Safety First! Why You MUST Be Careful
This is super important, folks. AC capacitors store electrical energy, even when the power to the unit is turned off. This stored energy can give you a nasty shock if you’re not careful. So, safety is our number one priority.
Before you even think about touching anything inside your AC unit, you absolutely must turn off the power. This means shutting off the breaker that controls your air conditioner. It’s also a good idea to turn off the disconnect switch located near your outdoor unit.
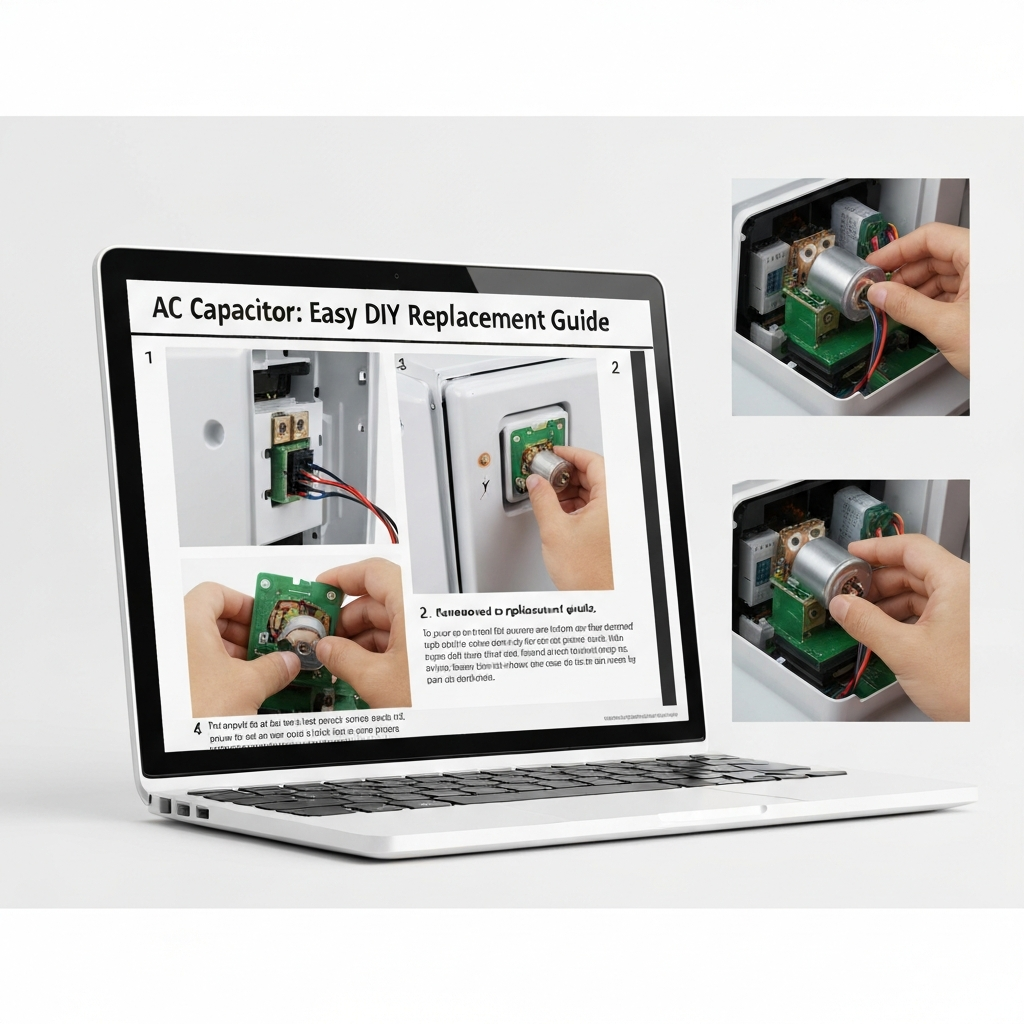
How to Safely Replace Your AC Capacitor: A Step-by-Step Guide
Ready to give it a shot? Grab your tools and let’s walk through this together. Remember, safety is key at every step!
Step 1: Turn Off the Power
Go to your home’s electrical panel and find the breaker for your air conditioner. Flip it to the “OFF” position. Then, head outside to your outdoor AC unit. You’ll usually find a metal box nearby called a disconnect switch. Pull it out or flip it to shut off power to the unit.
Step 2: Access the Capacitor
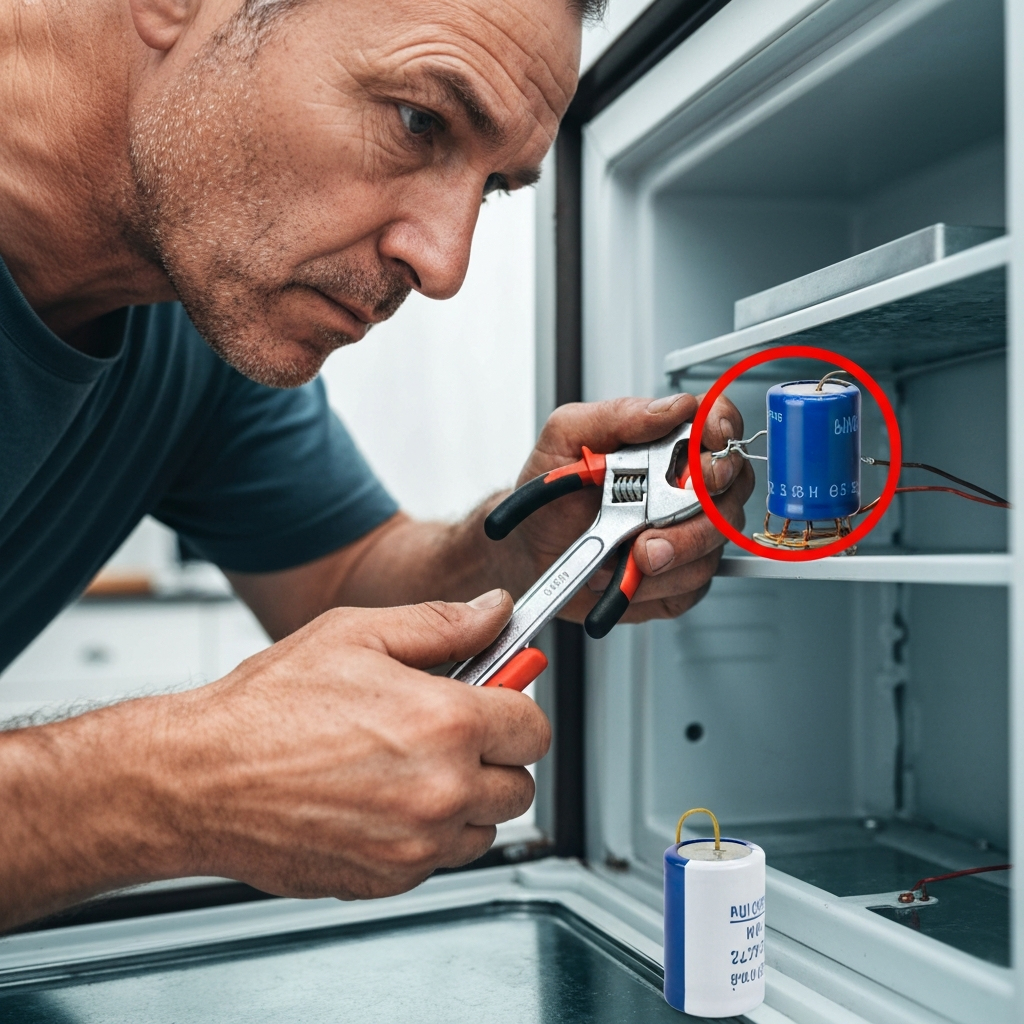
You’ll need a screwdriver or nut driver to remove the access panel on your outdoor unit. This panel usually covers the electrical components, including the capacitor. Once removed, you’ll see the capacitor, which looks like a silver or black metal can.
Step 3: Discharge the Capacitor (Very Important!)
Even with the power off, the capacitor can hold a charge. To safely discharge it, use an insulated screwdriver. Carefully touch the metal shaft of the screwdriver to each of the capacitor’s terminals, and then to the metal casing of the capacitor. Do this for all combinations of terminals. You might see a small spark, which is normal. This makes sure it’s safe to handle.
Step 4: Document the Wiring
Before you disconnect anything, take a clear picture with your phone of how the wires are connected to the capacitor terminals. Capacitors have terminals labeled “HERM” (for the compressor) and “FAN” (for the fan). There’s also usually a “C” or “COM” terminal for the common wire. This photo is your roadmap for putting the new one in correctly.
Step 5: Remove the Old Capacitor
Note the “MFD” (microfarads) rating and the voltage rating printed on the old capacitor. You’ll need to find a replacement with the same or very similar ratings. Use your screwdriver to carefully disconnect the wires from the terminals. Then, unclip or unscrew the capacitor from its mounting bracket.
Step 6: Install the New Capacitor
Place the new capacitor in the same spot as the old one and secure it with the clip or bracket. Now, use your photo as a guide to reconnect the wires to the correct terminals. Make sure each wire is firmly attached.
Step 7: Reassemble and Test
Put the access panel back on the outdoor unit and secure it with screws. Turn the power back on at the disconnect switch and then at your home’s breaker panel. Go inside and turn on your thermostat. Your AC should now start up and run normally!
How to Find the Right Replacement Capacitor
Finding the correct replacement is crucial. You need to match the MFD and voltage ratings as closely as possible. Here’s a quick guide:
| Capacitor Rating | What it Means | Where to Find It |
|---|---|---|
| MFD (Microfarads) | This is the capacitance value. It tells you how much electrical charge the capacitor can store. | Printed on the side of the old capacitor. |
| Voltage (V) | This is the maximum voltage the capacitor can handle. | Printed on the side of the old capacitor. |
You can usually find replacement capacitors at HVAC supply stores, online retailers like Amazon, or specialized electrical component shops. Always try to match the MFD rating exactly. For voltage, you can go slightly higher, but never lower.
When to Call a Professional
While replacing a capacitor is often a straightforward DIY task, there are times when it’s best to call a pro. If you’re not comfortable working with electrical components, or if you’ve followed these steps and your AC still isn’t working, it’s time to call a qualified HVAC technician.
Sometimes, a bad capacitor can be a symptom of a bigger problem, like a failing motor. A professional has the tools and expertise to diagnose complex issues and ensure your system is running safely and efficiently.
Frequently Asked Questions About AC Capacitors
Q1: How long does an AC capacitor typically last?
A: They can last anywhere from 5 to 20 years, depending on the quality, climate, and how much they’re used. Regular maintenance can help them last longer.
Q2: Can I use a capacitor with a higher voltage rating?
A: Yes, you can use a higher voltage rating, but the MFD rating should be the same. A higher voltage means it can handle more electrical pressure.
Q3: What happens if I use the wrong MFD rating?
A: Using the wrong MFD rating can cause your AC’s motor to overheat, run inefficiently, or fail completely. It’s best to match it exactly.
Q4: How much does an AC capacitor cost?
A: DIY replacement capacitors typically range from $10 to $30, making it a very cost-effective repair.
Q5: Is it safe to test a capacitor?
A: Testing a capacitor requires a multimeter and knowledge of how to use it safely, especially to discharge it. If you’re unsure, it’s safer to just replace it if you suspect it’s bad.
Q6: My AC is still not working after replacing the capacitor. What now?
A: This usually means the problem is something else, like a faulty contactor, thermostat, or even a compressor issue. It’s time to call a professional technician.
Keep Your Cool with Simple AC Care
Taking care of your air conditioner doesn’t have to be complicated. By understanding parts like the capacitor and knowing when and how to perform simple maintenance or repairs, you can keep your system running smoothly and save money on energy bills and costly service calls. Remember to always prioritize safety when working with electrical components.
Stay cool and comfortable all year round with a little bit of know-how. Happy AC troubleshooting!