
Quick Summary: To fix mold on your window AC, always unplug it first! Then, safely remove the front filter, clean it thoroughly with warm, soapy water, and use a diluted vinegar or bleach solution (sparingly) on accessible plastic parts. Ensure everything is completely dry before reassembly to stop the mold from coming back.
Is your window AC unit blowing air that smells musty or just plain funny? You are not alone in this. That damp, funky smell usually means mold or mildew is having a little party inside your cool box. Nobody wants that—it’s bad for your air quality and your peace of mind.
Don’t worry about needing a technician or complicated tools for this fix. I’m Jack from ACReviewHub.com, and I’ve seen thousands of these units. I’m going to walk you through this step-by-step, using simple language. By the end of this guide, you will know exactly how to clean that mold safely and get that fresh, cool air flowing again.
How to Remove Mold From Your Window AC: The Savage Fix Guide
Why Does Mold Love My Window AC Unit?
Mold needs three things to grow: moisture, warmth, and a food source (like dust or debris). Your AC unit naturally creates condensation—that’s the moisture part. When you turn the AC off, that leftover dampness, mixed with dust, becomes a perfect breeding ground.
This usually happens because the filter got too clogged or the drain pan isn’t draining properly. It’s a common issue, especially during humid seasons.
Step 1: Safety First – Shut Down the Power!
This is the most critical step, so please don’t skip it. We are dealing with electricity and water, so safety is number one. Think of this like turning off the stove before you start cooking.
- Locate the power cord for your window AC unit.
- Unplug it completely from the wall outlet. If the cord is hard to reach, turn off the corresponding circuit breaker in your home’s electrical panel.
- Wait about five minutes. This allows any stored energy in the unit’s capacitors to safely dissipate.
Step 2: Accessing the Dirty Work Area
We need to get to the parts where that funky smell is coming from, which is usually the filter and the front grille.
Most window units have a removable front panel or grille. Check your owner’s manual if you can’t figure it out, but usually, you just gently pull down or pop the front cover off.
Once the cover is off, you will see the air filter. These filters slide right out—no tools needed usually.
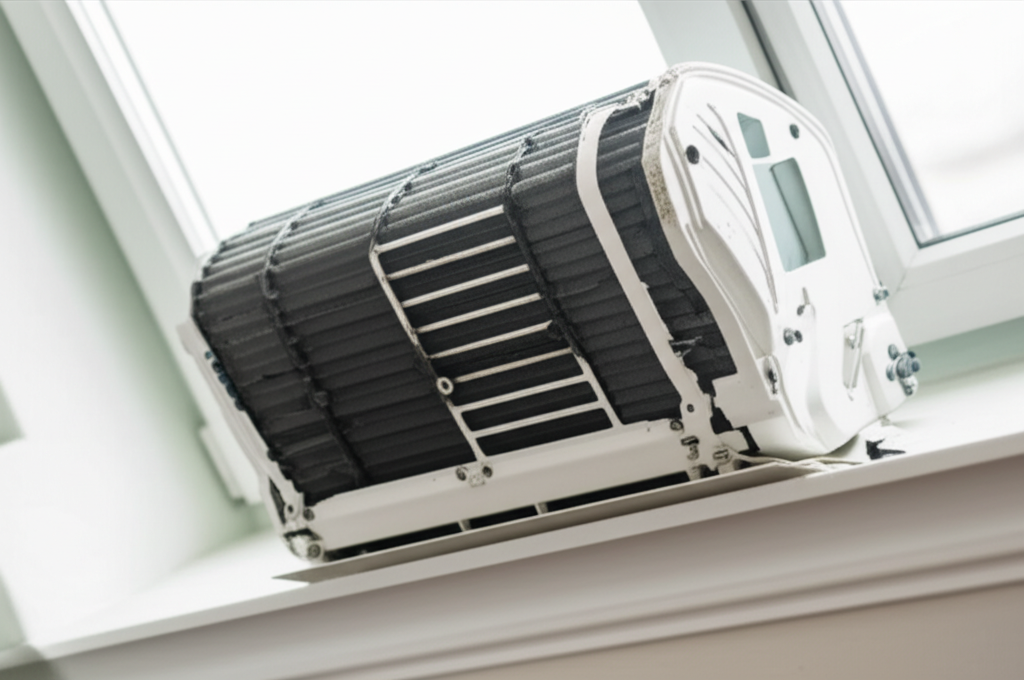
Step 3: Cleaning the Moldy Air Filter
The filter catches all the dust, and if it stays wet, it traps mold spores too. This is often the main culprit.
If your filter is the flimsy, cheap kind, it might be easier and safer to just replace it. If it’s a washable, thicker filter, here is how you clean it:
- Take the filter outside or into a utility sink.
- Use warm water and mild dish soap. Gently scrub both sides with a soft brush or cloth. Rinse thoroughly.
- For stubborn mold spots, you can soak the filter in a solution of 1 part white vinegar to 3 parts water for about 30 minutes. Vinegar is a natural mold killer.
- Rinse it one last time until all soap or vinegar smell is gone.
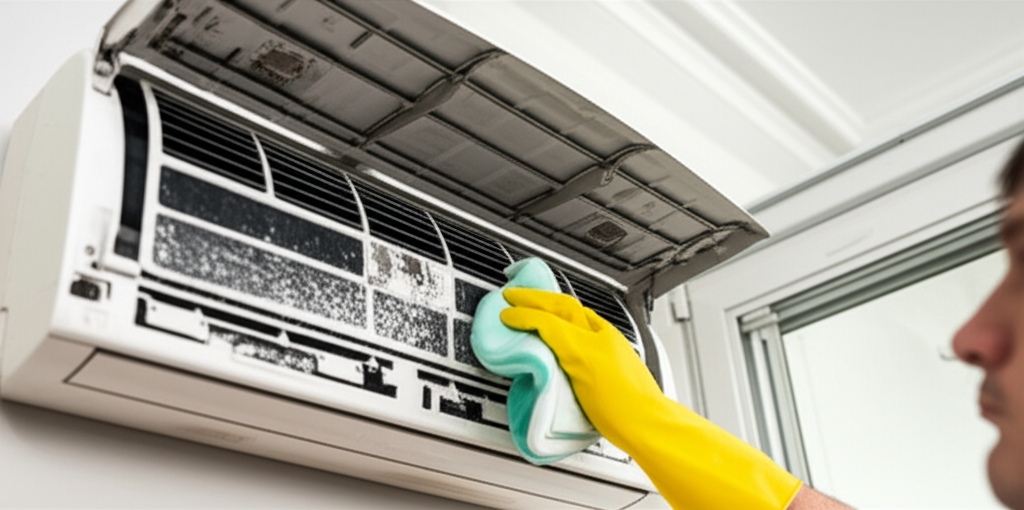
Step 4: Tackling the Inside Coils and Housing
This is where we get a little more serious, but still safe for a beginner. We are aiming for the visible mold on the plastic housing and the accessible fins near the front.
Important Note: Do not spray water or cleaning solution directly onto the internal cooling coils (the metal radiator parts) or the electrical components near the back. Stick to the plastic housing and accessible areas.
Here is the mold-busting solution you can safely use:
| Cleaning Agent | Best For | How to Use |
|---|---|---|
| Mild Dish Soap & Water | General dust and light grime on plastic casing. | Spray lightly and wipe clean with a soft cloth. |
| Diluted White Vinegar (1:1 ratio with water) | Light surface mold on plastic or hard surfaces. | Apply with a damp cloth, let sit 10 minutes, then wipe clean. |
| Bleach Solution (1 Tbsp per quart of water) | Stubborn, visible mold spots (use sparingly). | Dab onto the moldy area with a sponge. Rinse thoroughly afterward. |
Wipe down the entire front plastic housing, the louvers (the flaps that direct air), and any plastic surfaces you can reach without dismantling the whole unit. Always wipe away from the internal components.
For more in-depth cleaning advice on coils, check out this great resource from Energy.gov on keeping your AC running efficiently.
Step 5: The Crucial Drying Process
If you put a damp unit back together, the mold will be back before you know it. Drying is essential!
Let all the cleaned parts—the filter, the cover, and any damp interior spots—air dry completely. This might take a few hours in a warm, dry room. You can point a regular fan toward the open unit to speed this up, but make sure the fan is blowing out of the unit.
Once everything is bone dry, slide the clean filter back in, snap the cover on, and plug it back in.
Preventing Mold from Returning: Proactive Care
Now that you’ve defeated the mold, let’s keep it from staging a comeback. Prevention is always easier than a “savage fix” later on.
Here is a simple checklist to keep your AC fresh:
- Check Filters Monthly: Clean or replace your filter at least once a month during heavy use seasons.
- Run the Fan Setting: Before shutting the unit off for the day, run it on the “Fan Only” setting for 15–30 minutes. This helps dry out the interior components.
- Check the Drain: Make sure the exterior drain hole (usually at the bottom back) isn’t blocked. If water backs up inside, it stays damp and breeds mold.
- Use the Right Size AC: An oversized unit cools too quickly and doesn’t run long enough to dehumidify properly, leading to extra moisture.
Troubleshooting Common Smells After Cleaning
Sometimes, even after cleaning, a smell lingers. Here’s what that might mean:
| Smell Description | Likely Cause |
|---|---|
| Mildew/Musty Smell | Residue mold left behind or incomplete drying. |
| Burning/Hot Plastic Smell | Electrical issue or debris caught in the fan motor (Unplug immediately and call a pro). |
| Rotten Eggs/Sulfur Smell | This is rare, but could indicate sewer gas leaking into the unit’s ventilation. |
If you smell something truly strange, like burning plastic, turn the unit off immediately. You can find more diagnostic tips from organizations like ASHRAE (American Society of Heating, Refrigerating and Air-Conditioning Engineers) if you suspect a deeper mechanical issue.
Frequently Asked Questions from Beginners
Got a few last-minute worries? I’ve heard them all. Here are some quick answers:
Q: Can I use Lysol or strong chemical sprays inside my AC?
A: Generally, no. Strong chemicals can damage the delicate aluminum fins or react badly with the refrigerant. Stick to mild soap or diluted vinegar.
Q: How often should I deep clean my window AC?
A: If you use it daily in the summer, clean the filter every month and do a light wipe-down of the housing every two months.
Q: My AC still smells bad even though I cleaned the filter. What now?
A: The mold is likely deeper, on the evaporator coil. You can buy special no-rinse coil cleaner sprays at hardware stores. Make sure the unit is unplugged and spray only the coil area as directed.
Q: Is it safe to clean the outside part (the back)?
A: Yes, the outside part that faces the elements needs cleaning too, usually with a garden hose to flush out dirt, but again, keep water pressure low and away from electrical boxes.
Q: Does running the AC on “Dry Mode” help prevent mold?
A: Yes! Dry or dehumidify mode runs the compressor without cooling too much, which pulls excess moisture out of the air, keeping things drier inside.
See? That wasn’t so scary after all. Tackling mold on your window AC is mostly about being diligent with your filters and ensuring everything dries out properly after use. A little routine care goes a long, long way in keeping your unit healthy and your home smelling fresh.
You’ve got this — and cool, comfortable air is just a few simple steps away.